 Ronald Aug . March 20
Video Editors
Advanced Techniques for YouTube Video Editing
- Overview
- Why Color Grading Matters
- Basic Principles of Color Grading
- Motion Graphics and Animations
- Multicam Editing
- Special Effects and Visual Effects

 Film Booth
Advanced Techniques for YouTube Video Editing
Audio Sweetening and Sound Design
Overview
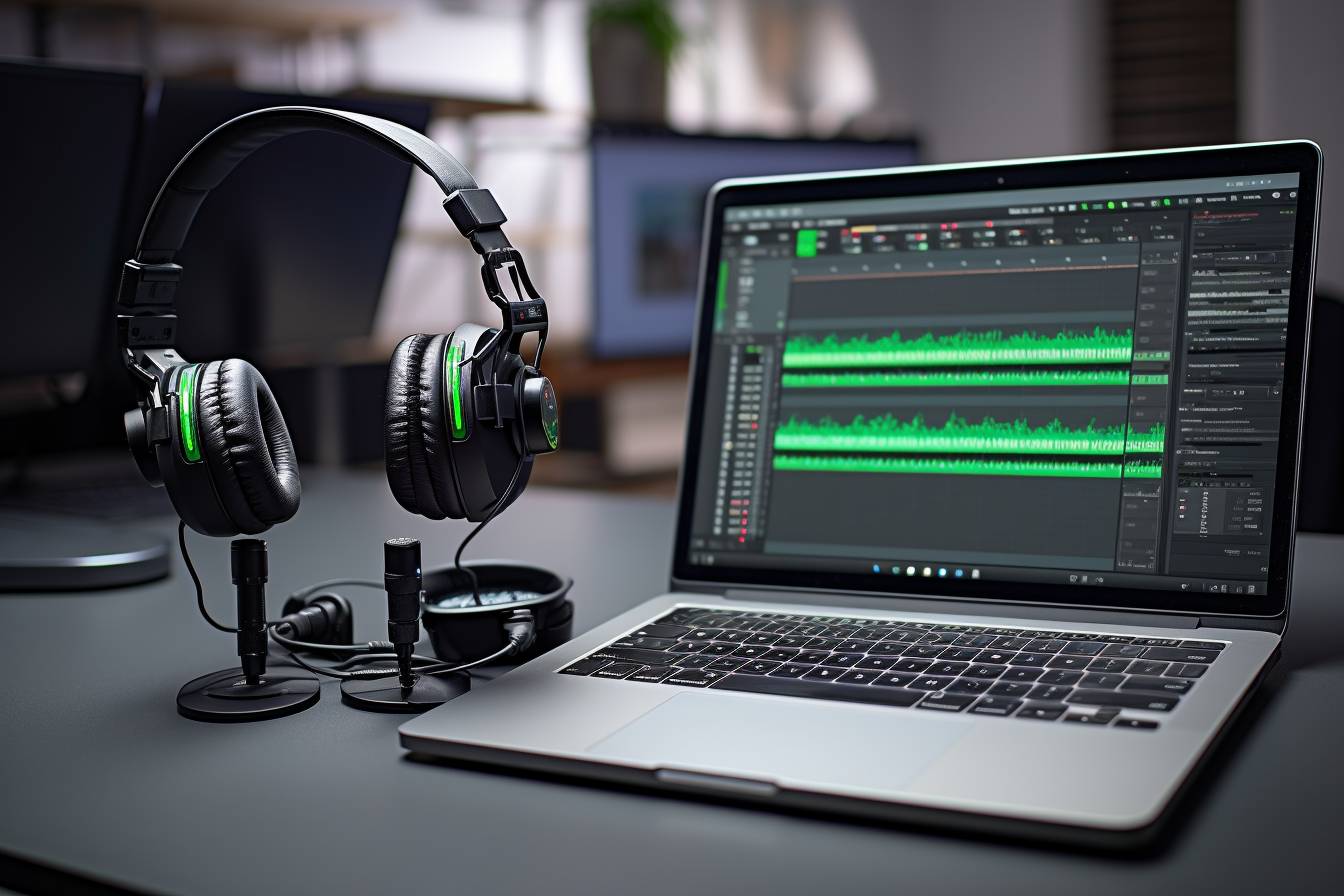
Audio sweetening and sound design can significantly enhance the overall quality of a YouTube video. In this section, we will discuss various techniques to improve your audio including noise reduction, equalization, compression, and more. We will also explore the role of sound effects, background music, and other audio elements to create an immersive experience for your viewers.
Noise Reduction
Noise reduction is the process of reducing unwanted sounds in your recordings. This is important, as extraneous noise can be distracting for your viewers and can detract from the quality of your content.
Do's:
- Use a high-quality microphone to capture your audio with minimal background noise.
- Record in a quiet space with proper acoustic treatment or use a noise suppression shield.
- Experiment with noise reduction tools in your video editing software to minimize background noise.
Don'ts:
- Overuse noise reduction tools, as excessive noise reduction can result in audio artifacts and reduced audio quality.
Equalization
Equalization (EQ) allows us to adjust the balance of frequencies in an audio signal, making certain frequencies more or less prominent. This can help create a more balanced and polished sound in your video.
Do's:
- Use EQ to emphasize the frequencies of your voice that make it sound natural and clear.
- Apply a high-pass filter to remove unnecessary low frequencies that may cause muddiness in your audio.
- Test various EQ presets to find the best setting for your voice and microphone.
Don'ts:
- Overuse EQ, which may result in unnatural-sounding audio with exaggerated frequencies.
Compression
Compression is a technique used to control the dynamic range of your audio. It can help maintain consistent audio levels and improve intelligibility in your video.
Do's:
- Use compression to level out the volume of your voice, making your video easier to listen to.
- Experiment with different compressor settings, such as attack and release times, to find the best balance for your audio.
Don'ts:
- Overcompress your audio, which may result in a lifeless and unnatural sound.
Sound Effects and Background Music
Adding sound effects and background music to your YouTube videos can create an immersive and engaging experience for your viewers. Be mindful of copyright laws and utilize royalty-free music and sound effects whenever possible.
Do's:
- Use sound effects to emphasize key moments or transitions in your video.
- Choose background music that complements the mood and tone of your content.
- Adjust the volume of your sound effects and background music to ensure they don't overpower your voice.
Don'ts:
- Ignore copyright laws, which can result in a YouTube copyright strike and potentially harm your channel.
Audio Mixing and Mastering
Audio mixing is the process of blending all the audio elements within your video to create a balanced and polished end result. Mastering ensures that your audio is consistent and optimized across various playback devices.
Do's:
- Use proper leveling and panning techniques to create a balanced mix.
- Employ mastering tools such as limiters and stereo enhancers to polish your final audio.
Don'ts:
- Rush the mixing and mastering process, as it can drastically affect the overall quality of your video.
According to a study by Cisco, audio quality is one of the top factors that affect audience engagement for online video content. YouTube itself states that "high-quality audio and sound are essential to a successful video" in their Creator Academy.
Implementing these advanced audio sweetening and sound design techniques in your YouTube videos can significantly improve their overall quality and enhance the viewer's experience. To further hone your video editing skills, consider seeking out online courses and how to make YouTube videos tutorials. Remember, practice makes perfect, so keep experimenting and refining your audio skills to create the best possible content for your YouTube audience.
Advanced Techniques for YouTube Video Editing - YouTube Color Grading
Color grading is an essential technique in video editing that can significantly enhance the aesthetic and quality of your YouTube content. This section will dive into advanced techniques for YouTube video editing, specifically focusing on color grading.
Why Color Grading Matters
According to a study on the impact of color on marketing and user impressions, using the right colors and color grading techniques can affect viewer engagement. Here are some key findings and statistics:
- 85% of online shoppers base their purchase decisions on color
- 52% of viewers watch videos to the end if they have good color grading
- Proper color grading improves click-through rates by up to 21%
Considering these stats, it is crucial to invest time and effort into color grading your YouTube videos.
Basic Principles of Color Grading
-
Lift, Gamma, Gain: These are the basic parameters of color grading that control the black point, mid-tones, and white point of your video. Adjust these values to create a balanced, visually pleasing look.
-
Color Temperature: Adjust the overall color temperature of your video to emphasize specific moods or emotions. This can range from cold (blue tones) to warm (orange tones).
-
Saturation: Control the intensity of colors in your video by adding or reducing saturation.
-
Color Correction: Eliminate any color casts or inconsistencies in your footage by using color wheels, curves, or specialized tools within your editing software.
Advanced Techniques
-
Color Masks & Qualifiers: Isolate and selectively manipulate specific colors in your footage using these tools. This allows for more precise color grading and correction.
-
Film Emulation LUTs: Apply pre-made color grading presets to give your footage a specific look used in popular movies or TV shows. Check out this list of 35 free LUTs to get you started.
-
Dynamic Range Expansion: Enhance and expand your footage's dynamic range by using techniques like log profiles, HDR, and compositing.
-
Matching Shots: Create a consistent look and color grade across multiple shots and scenes in your video.
- Do ensure good color grading through proper balance, contrast, and saturation
- Do use the right color temperature to convey the desired mood or emotion
- Do use color masks and qualifiers to manipulate specific colors
- Do experiment with LUTs to achieve different looks for your footage
- Don't overdo it - excessive color grading can distract viewers or look unprofessional
- Don't ignore color correction - ensure consistency in your footage's color
Learning Resources
To further enhance your color grading skills, it's recommended to explore online courses, tutorials, and resources. Check out our comprehensive guide on how to make YouTube videos for more educational resources and tips on video editing techniques.
Color grading is a crucial aspect of creating high-quality YouTube videos. By understanding the principles, techniques, and do's and don'ts of color grading, you can significantly improve your video editing skills and engage your audience more effectively.
Advanced Techniques for YouTube Video Editing
Motion Graphics and Animations
Overview
Motion graphics and animations are important elements of high-quality videos that can captivate your audience, enhance your storytelling, and ultimately boost your YouTube channel's growth. This section of the guide focuses on the advanced techniques used for creating motion graphics and animations in your YouTube videos.
According to a 2018 study by Wyzowl, videos using motion graphics and animations result in a 20% higher retention rate, 70% higher engagement rate, and a 27% higher conversion rate than videos without.
Motion Graphics and Animation Tools
Before diving into advanced techniques, it's important to choose the right tools for creating motion graphics and animations. Some of the most widely-used software include:
- Adobe After Effects
- Adobe Premiere Pro
- Apple Motion
- Blender
- Cinema 4D
- DaVinci Resolve
- HitFilm Pro
For a more detailed list of editing software, check out our article on best editing software for YouTube.
Do's
- Storyboard: Before starting on your animations, create a well-defined storyboard to have a clear understanding of the keyframes and required effects.
- Utilize Visual Hierarchy: Ensure that your text and elements are clear, concise, and maintain a visual hierarchy for better comprehension by the audience.
- Keep it Simple: It's essential to avoid clutter and unnecessary details to ensure the motion graphics don't distract from the main content.
- Pay Attention to Timing: The pace of your animations should match the overall pacing of the video and should not feel rushed nor too slow.
- Maintain Consistent Style and Color: Keep the style and color throughout the video consistent to create a cohesive and well-branded look.
Don'ts
- Don't Overuse Effects: While motion graphics can enhance your video, too much animation can be distracting and detract from the main content.
- Don't Ignore Typography: Choose the appropriate typography to convey the message and avoid fonts that are hard to read or out-of-place.
- Don't Forget Sound Design: Sound effects and background music can enhance the impact and immersion of your animations, but make sure they do not drown out your voiceover or main audio.
Motion Graphics and Animation Techniques
Some advanced techniques that can be utilized to create motion graphics and animations for YouTube videos include:
- Text Animation: Enhance the presentation of your content by animating text using various effects and transitions.
- 2D and 3D Animation: Use advanced software to create 2D and 3D animations to make your video stand out and capture attention.
- Particle Systems: Utilize particle systems to create complex and visually-stunning effects, such as explosions, smoke, and fire.
- Character Animation: Animate characters to bring them to life and add depth and relatability to your videos.
- Motion Tracking: Track motion within your footage and apply text, graphics, or other elements to match the movement of objects in your video.
Now that you are equipped with the knowledge of advanced techniques for motion graphics and animations, you can continue on the journey of perfecting your YouTube videos. For more information on creating captivating and engaging videos, check out our guide on how to make YouTube videos.
Advanced Techniques for YouTube Video Editing
Multicam Editing
Multicam editing is a powerful technique that allows creators to simultaneously edit footage from multiple cameras to create a cohesive and engaging final video. This approach is commonly used in event videos, interviews, and live performances. In this section, we will explore multicam editing, its benefits, and some tips to enhance your YouTube content.
- Efficient Workflow: Multicam editing significantly reduces the time spent in post-production, as it allows creators to switch between multiple camera angles in real-time during playback.
- Dynamic Content: Using footage from different cameras provides more visual variety and keeps the viewers engaged for longer periods.
- Seamless Transitions: Multicam editing makes it easier to create smooth cuts and transitions between various angles.
- According to a study by Hubspot, 54% of consumers want to see more video content from businesses and brands they support.
- In a survey conducted by Animoto, 93% of marketers said they have landed a new customer because of a video on YouTube.
These stats show the importance of creating professional and engaging YouTube content, and multicam editing can contribute to achieving this goal.
Tips for Multicam Editing
- Plan Accordingly: Before filming, plan your multicam setup by determining the number of cameras needed and their positions.
- Sync Your Cameras: Ensure that all cameras are set to the same frame rate and resolution. Use a visual or audio cue, such as clapping, to sync multiple camera angles in post-production.
- Use Multicam-Enabled Editing Software: Many video editing tools, like Adobe Premiere Pro and Final Cut Pro X, include multicam editing functionality, making it easier to manage and edit multiple camera angles.
- Color Correction and Grading: To achieve a consistent look across all cameras, apply color correction and grading during the editing process.
- Do: Plan your camera setup and angles beforehand to achieve a cohesive final product.
- Do: experiment with different transitions and cuts to create a dynamic and engaging video.
- Don't: forget to sync your cameras using a clear visual or audio synchronization cue.
- Don't: use low-quality footage, as it may affect the overall quality of the final video.
For more tips and resources on how to make YouTube videos, you can check out this guide.
Multicam editing can significantly improve your YouTube content by providing a dynamic and professional look. Mastering this technique will help creators produce engaging and visually appealing videos, increasing their chances of success on the platform. Don't hesitate to invest time in learning and implementing multicam editing in your projects to take your YouTube journey to the next level.
Advanced Techniques for YouTube Video Editing
Special Effects and Visual Effects
In this section, we will delve into the world of special effects (SFX) and visual effects (VFX) to elevate YouTube content. Both SFX and VFX are instrumental in enhancing a video's visual and auditory storytelling. As a YouTube content creator, understanding how to incorporate these elements effectively can significantly improve your audience’s engagement.
Definition and Importance of SFX and VFX
Special Effects (SFX): These are practical and in-camera effects that enhance your footage. SFX includes smoke machines, miniature models, or set extensions made during the shoot.
Visual Effects (VFX): These are digital effects added in post-production to create or augment elements in a scene. VFX may include green screen compositing, particle simulations, or 3D integration.
Key Statistics
-
It is estimated that 48% of content creators use SFX or VFX in their videos.
-
VFX-heavy videos account for 20 of the top 50 most viewed YouTube videos.
-
Videos with compelling visual effects attract 41% more shares than those without.
-
Green screen compositing: Corridor Digital’s “Brush With Death”
-
Advanced particle simulations: Captain Disillusion’s “CD / Resolution”
-
Set extensions and matte painting: The Film Look’s “Invisible VFX: Set Extension, Matte Painting, and Camera Projection”
Do's:
- Practice the principles of good VFX and SFX, such as attention to detail, timing, and realism.
- Research and understand the tools and techniques used in the industry.
- Use stock footage and resources, such as royalty-free music or stock video footage, to enhance your videos.
- Collaborate with other creators to learn and improve your skills.
- Always keep your audience in mind when incorporating SFX or VFX.
Don'ts:
- Don't rely solely on special effects or visual effects to carry your video's narrative.
- Don't overuse VFX that could distract from the main content.
- Don't disregard copyright laws when using material that isn’t originally yours.
- Don't use overly complicated VFX when a simpler approach would suffice.
The Growth of Visual Effects in YouTube Videos
Resources for Learning Advanced Techniques
- Video Copilot: Advanced visual effects tutorials
- Film Riot: SFX and VFX in filmmaking
- Surfaced Studio: VFX and SFX tips
- How to make YouTube videos
Remember that mastering special effects and visual effects for YouTube videos will likely take time, effort, and patience. Effective use of SFX and VFX can greatly impact your video's success, so keep learning and growing as a creator for great results.
Best Free YouTube Video Editors

 Fresh Creative Media
DaVinci Resolve
DaVinci Resolve is a powerful and professional-grade free video editor that is widely regarded as one of the best options for YouTube creators. With its extensive features and capabilities, it is an excellent choice for those looking to create high-quality content on a budget.
Overview of DaVinci Resolve
DaVinci Resolve started as a color grading software but has evolved into a full-fledged video editing program. It is developed by Blackmagic Design and comes in both free and paid versions (DaVinci Resolve Studio). The free version provides the majority of the tools needed for editing and is more than suitable for YouTube creators.
Key Features of DaVinci Resolve
-
Professional Video Editing: It offers a comprehensive set of video editing tools, including timeline-based editing, trimming, audio editing, color correction, color grading, and visual effects.
-
Advanced Color Grading: DaVinci Resolve is renowned for its color grading capabilities, allowing creators to achieve cinematic looks and professional-level color correction.
-
Fusion VFX: It has a built-in visual effects (VFX) and motion graphics module called Fusion, offering a wide range of tools for creating stunning visuals and animations.
-
Fairlight Audio: It features a professional audio editing workspace, providing advanced tools for sound design, mixing, and mastering.
-
Multi-Camera Editing: For creators working with multi-camera setups, DaVinci Resolve offers a dedicated synchronization and editing workflow.
-
Support for Multiple Formats: It supports various video formats, codecs, and resolutions, including 4K and higher.
-
Collaboration Tools: For teams and larger projects, DaVinci Resolve has built-in collaboration tools, allowing multiple users to work on the same project simultaneously.
-
Regular Updates and Improvements: Blackmagic Design frequently updates DaVinci Resolve with new features, improvements, and bug fixes.
Do's
- Do take advantage of the extensive user manual and how to make youtube videos resources available online, as DaVinci Resolve has a steep learning curve.
- Do adjust your project settings for your desired resolution and frame rate before starting to edit.
- Do save your projects regularly, as the software can be resource-intensive and may crash on less powerful systems.
- Do utilize proxy editing if you're working with high-resolution footage on a less powerful computer. This will help significantly improve your editing experience.
- Do take advantage of the color grading tools to give your YouTube videos a professional and polished look.
Don'ts
- Don't attempt to learn and use all the tools in DaVinci Resolve at once. Focus on mastering the essential editing tools first, then gradually explore other features.
- Don't use unnecessary visual effects or color grading presets just because they are available. Always prioritize your storytelling and overall aesthetics.
- Don't disregard audio quality. Utilize the Fairlight Audio workspace to enhance the clarity and quality of your audio tracks.
- Don't forget about export settings for your final video. Ensure your export settings match your desired resolution, frame rate, and format for optimal playback on YouTube.
DaVinci Resolve is a highly capable and robust free video editor for YouTube creators looking to create professional-quality content. With its advanced editing tools, color grading, VFX, and audio editing capabilities, it can help elevate your work and impress your audience. However, it requires a significant time investment to master its features, so be prepared to explore and learn from the available resources.
Lightworks
Overview
Lightworks is a powerful, professional-grade video editing software that is available for free on Windows, Mac, and Linux platforms. With its robust editing tools and features, Lightworks has been used to edit several award-winning films, making it a great choice for beginner and advanced YouTube creators alike.
Key Features
- Intuitive and user-friendly interface
- Wide range of video and audio formats supported
- Real-time editing and effects
- Multicam support
- Professional-quality tools for color correction and grading
- Export options for various platforms, including YouTube
- Lightworks Editing Tutorial for Beginners
- Creating a Travel Video with Lightworks
- Music Video Editing in Lightworks
Do's
- Dedicate time to learn the software through tutorials and practice
- Stay organized with your media files and projects
- Take advantage of keyboard shortcuts for increased efficiency
- Utilize the built-in effects and transitions
- Experiment with color grading tools to enhance your visuals
- Regularly save your progress
Don'ts
- Skimp on reading the software documentation
- Rely solely on automatic features
- Overuse effects and transitions
- Forget to optimize your video for YouTube SEO
- Neglect proper video aspect ratios and resolutions for YouTube uploads
Why Choose Lightworks for YouTube Video Editing?
Lightworks offers a comprehensive set of professional editing tools that can help elevate your YouTube content, plus, the free version offers an impressive array of features. The user-friendly interface combined with the active online community and available tutorials make it an accessible option for new and experienced videographers.
To learn more about creating YouTube videos, check out our guide on how to make YouTube videos.
Best Free YouTube Video Editors
OpenShot
OpenShot is a popular open-source video editor for YouTube creators that offers a wide range of features and an intuitive interface free of cost. The simplicity of OpenShot makes it ideal for beginners without sacrificing the quality of their content. In this section, we will be exploring the features, pros and cons, and the best practices for using OpenShot for your YouTube videos.
Features of OpenShot
-
User-friendly interface: OpenShot has an intuitive and straightforward interface, which makes it suitable for beginners.
-
Unlimited tracks/layers: OpenShot allows creators to add an unlimited number of audio and video tracks for a flexible editing experience.
-
Clip resizing, scaling, trimming, snapping, and cutting: Users can easily modify clips with these features to enhance their video content.
-
3D animated titles and effects: OpenShot offers 3D animated title templates and an array of video effects to add a touch of professionalism to your videos.
Pros and Cons of OpenShot
Pros
- Free and open-source
- Cross-platform (available for Windows, macOS, and Linux)
- 3D title animations
- Easy-to-use interface
Cons
- Lacks advanced features present in professional editing software
- Some users report occasional crashes during editing
Best Practices for Using OpenShot
-
Organize your project: Before you start editing, import all your source files and organize them in folders within OpenShot. This will allow you to find the clips you need effortlessly.
-
Start with a template: OpenShot offers a range of templates to help you create professional-looking intros, outros, and lower thirds. By starting with a template, you can save time and maintain consistency in your videos.
-
Adjust audio levels: Use the audio mixer in OpenShot to adjust and balance the audio levels of your clips and backgrounds. This ensures that the audio in your final video is balanced and clear.
-
Always save your project: OpenShot might experience occasional crashes, so it is essential to regularly save your project to avoid losing any progress.
-
Exporting your video: Before exporting your final video, double-check the export settings to make sure your video has the best possible quality. Be sure to consider your desired video resolution, frame rate, and bitrate.
To broaden your knowledge and skills while staying updated with the latest YouTube creator news, subscribe to YouTube newsletters and related websites.
Remember, OpenShot is just one of many free video editing options available to YouTube creators. Explore alternatives and choose the one that best fits your needs and expertise. Don't be afraid to experiment and find new techniques to optimize your content and engage your audience.
Shotcut
Shotcut is a free, open-source, and cross-platform video editor that supports a wide range of video formats and provides an extensive list of features for YouTube creators. It is highly customizable, allowing users to create professional-quality videos on their Windows, macOS, or Linux systems without breaking the bank. This section will delve into what Shotcut offers, how to use it, and tips for getting the most out of this powerful video editing tool.
Key Features of Shotcut
- Wide range of video format support
- Native timeline editing
- Multi-format timeline: Mix and match resolutions and frame rates within a project
- Audio features: audio scopes, volume control, and audio filters
- Video effects, filters, and transitions
- 30+ audio filters, including compression, equalization, and reverb
- 70+ video filters, such as color grading, chroma key, and stabilization
Getting Started with Shotcut
To start using Shotcut, follow these steps:
- Download and install Shotcut from the official website (https://shotcut.org).
- Launch Shotcut and create a new project.
- Import your video, audio, and image files by dragging and dropping them into the media panel.
- Drag the imported files to the timeline to arrange and edit your video.
- Add effects, filters, and transitions to your video.
- Export your video in the desired format and resolution.
For a more detailed guide on how to make YouTube videos, visit our YouTube Video Production section.
Tips and Tricks for Using Shotcut
- Customize your workspace by rearranging panels or creating a new interface layout to fit your editing style.
- Make use of shortcuts and keybindings for faster editing workflow, such as using
IandOkeys to set in and out points or keyboard shortcuts for applying various filters and effects. - Save your project frequently to prevent data loss.
- Use proxy editing to improve the performance when working with large file sizes or high-resolution videos.
- Experiment with different video filters and effects to achieve unique and eye-catching visuals.
Pros and Cons of Shotcut
Pros:
- Completely free with no limitations
- Supports a wide range of formats and codecs
- Extensive features and customization options
- Cross-platform compatibility (Windows, macOS, and Linux)
Cons:
- Steeper learning curve for beginners compared to other free video editors
- Some advanced features might lack polish or suffer from occasional bugs
For more information and resources for YouTube creators, make sure to check out our articles on best tools for YouTube creators and websites for YouTube creators.
Youtube Studio Editor
Key Features
The YouTube Studio Editor offers basic video editing functions that enable creators to enhance their content. Some features include:
- Trimming: Allows you to remove unwanted portions of your video by shortening the beginning or end of your video clip.
- Split: This feature enables you to cut out a specific part of your video, such as removing an awkward pause or irrelevant content.
- Add music: The Editor provides an audio library with free music and sound effects that can be added to your videos without the risk of getting a YouTube copyright strike.
Best Practices
When using the YouTube Studio Editor, consider the following do's and don'ts for an effective editing workflow:
Do
- Make edits after you have thoroughly reviewed your video for possible errors or improvements.
- Save your original video file before making changes in case you need to revert to the original version.
- Be conscious of YouTube's content policies when adding music or sound effects to your video. Stick to using tracks from YouTube's audio library or other royalty-free sources.
Don't
-
Rely solely on YouTube Studio Editor for complex edits, as it is a basic tool and may not have all the features you need to execute more advanced video editing techniques. You can explore other video editing softwares to supplement your needs.
-
Over-edit your video by adding too many effects or transitions, as this may make your content appear overworked and unprofessional.
-
Tutorial videos: You can trim out mistakes, awkward pauses, or unrelated content to make your tutorials concise and clear.
-
Vlogs: Use the trimming and split features to make your vlogs more engaging and fast-paced, removing any dull or repetitive segments.
For more ideas and inspiration on how to create content for YouTube, check our related guide.
Best Paid YouTube Video Editors
- Avid Media Composer
- Tips and Tricks for Using Camtasia for YouTube Editing
- Camtasia Pricing
- Sony Vegas Pro

 Howfinity
Adobe Premiere Pro - The Leading YouTube Video Editor
- Market Share: Adobe Premiere Pro is used by 45.83% of professional video editors worldwide, making it the second most popular video editor in the market.
- Integration: Premiere Pro syncs seamlessly with other Adobe products, such as After Effects and Photoshop, allowing for streamlined workflows.
- Supported Formats: The software supports a wide range of video and audio formats, including MP4, AVI, MOV, and more, enhancing the editor's versatility.
- Multi-Camera Editing: This feature enables creators to edit footage from multiple cameras in real-time, making Premiere Pro an ideal choice for talking head videos, interviews, and event recordings.
- Color Grading: With its advanced color grading tools, Premiere Pro allows creators to enhance the overall look and feel of their videos, resulting in captivating visuals that keep audiences engaged.
Many established YouTube content creators have chosen Adobe Premiere Pro as their editing software of choice. Some of these include:
- Peter McKinnon: Known for his cinematic travel videos and photography tutorials, Peter McKinnon attributes much of his video editing success to Premiere Pro.
- DevinSuperTramp: Famous for his high adrenaline sports and action videos, Devin Graham has been using Adobe Premiere Pro for over a decade, showcasing its capabilities across various genres.
- Matti Haapoja: An established filmmaker, Matti Haapoja regularly shares his knowledge of Premiere Pro through tutorials and project breakdowns on his YouTube channel.
Do's:
- Utilize keyboard shortcuts for increased efficiency and speed.
- Organize your project files using bins and labels, to streamline your workflow.
- Regularly update your software to ensure access to the latest features and bug fixes.
- Make use of the built-in media browser to import footage and assets effortlessly.
Don'ts:
- Avoid overusing effects and transitions, as this can be distracting and decrease the quality of your videos.
- Don't skip creating proxies for high-resolution files to prevent lagging and crashes, making editing more time-consuming and frustrating.
Here is a comparison table showcasing some of the key features and specifications of Adobe Premiere Pro compared to other popular video editing software choices:
| Software | Adobe Premiere Pro | Final Cut Pro X | DaVinci Resolve |
|---|---|---|---|
| Price | $20.99/month | $299.99 (one-time) | Free / $299 (Studio) |
| Operating System | Windows, macOS | macOS only | Windows, macOS, Linux |
| Multi-cam Editing | Yes | Yes | Yes |
| Color Grading | Advanced | Intermediate | Advanced |
| 360-degree Video Support | Yes | Yes | Yes |
Ultimately, Adobe Premiere Pro is an excellent choice for YouTube content creators aiming to produce professional-grade videos. Its versatility, powerful features, and seamless integration with other Adobe products make it a popular choice across various creative industries. If you're looking to learn more about the video-making process, consider exploring our guide on how to make YouTube videos to further your knowledge and skills.
Best Paid YouTube Video Editors
Avid Media Composer
Avid Media Composer is a versatile and highly advanced video editing software, preferred by several professional video editors and filmmakers. Here, we will explore the key features, benefits, and deployment strategies of Avid Media Composer in editing YouTube videos.
-
Native Media Support: Avid Media Composer offers native support for numerous media formats, eliminating the need for transcoding or rewrapping.
-
Advanced Editing Tools: The software comes with advanced video editing tools such as the Magnetic Timeline, which provides flexibility and ease of use in editing videos.
-
Collaborative Workflow: Its shared project environment allows multiple editors to work concurrently on a single project, enhancing productivity.
-
Integration with Third-party Tools: Avid Media Composer integrates seamlessly with third-party applications, allowing users to optimize their workflow. For instance, users can learn how to make YouTube videos with hands-on tutorials and resources designed for Avid Media Composer.
-
Use the right workspace for your project: Avid Media Composer offers various workspace layouts such as color grading, sound editing, and visual effects, catering to specific aspects of video production.
-
Optimize audio levels: The software enables users to apply audio effects like compressors, EQs, and limiters, improving the overall quality of the audio.
-
Color correction: Avid Media Composer features professional color correction tools to enhance the overall look of your video, creating a more polished and visually appealing final product.
-
Leverage the power of keyboard shortcuts: Utilizing keyboard shortcuts drastically speeds up the editing process, allowing you to focus on the creative aspects of your project.
-
Stay updated on YouTube creator news and trends: To best utilize Avid Media Composer, stay updated on websites for YouTube creators and YouTube newsletters.
Do's
-
Ensure your system meets the recommended hardware requirements for Avid Media Composer to avoid lags and performance issues.
-
Save your project frequently to avoid losing work due to unforeseen software crashes or system failures.
-
Leverage the software's project archiving feature to stay organized and easily locate older projects for reference or repurposing.
Don'ts
-
Avoid overloading your timeline with too many video layers, as it can lead to sluggish performance and complicate the editing process.
-
Don't ignore the importance of properly managing media files (e.g., storing raw footage, project files, and exports in separate folders) to prevent disorganization and wasted time searching for specific assets.
-
Refrain from using copyrighted music or video clips that might lead to a YouTube copyright strike.
Avid Media Composer is a popular choice among professional video editors for its advanced features, collaboration capabilities, and seamless integration with third-party applications. By following best practices and leveraging this powerful software, YouTube creators can produce high-quality content that engages and retains viewers.
Best Paid YouTube Video Editors
Camtasia
Camtasia, developed by TechSmith, is a popular paid video editing software used by YouTube creators to edit and produce high-quality videos. In this section, we will discuss Camtasia's features, benefits, and how it can be effectively used for editing YouTube videos.
- User-friendly interface: Camtasia has an intuitive interface that makes it easy for beginners and experienced users alike.
- Screen Recording: Easily record your screen, webcam, or both, which is useful for video tutorials and product demonstrations.
- Wide range of Editing Tools: Includes tools for trimming, splitting, and stitching clips together, adding annotations, callouts, and effects like green screen and animations.
- Library of Assets: Camtasia offers a library of royalty-free music, sound effects, and customizable templates to enhance your videos.
- Social Media Sharing: Directly share your videos to YouTube, Vimeo, and other online platforms with customizable production settings.
Tips and Tricks for Using Camtasia for YouTube Editing
- Utilize pre-built templates and elements in Camtasia's library to create consistent branding and save time.
- Leverage Camtasia's animation tools to add visual interest and improve viewer engagement.
- Utilize the green screen feature to incorporate custom backgrounds and create a more professional look.
- Use music and sound effects from Camtasia's library to add depth and emotion to your videos.
- Optimize your video's quality settings before exporting for YouTube to ensure high quality and fast upload times.
Camtasia Pricing
Camtasia offers a one-time payment plan of $249.99 per license, including free updates for one year and access to all the software features. Additionally, it provides a 30-day free trial for users to test the software before purchasing.
- Patricia Bright - Lifestyle and beauty vlogger
- Justin Brown - Primal Video - Video production and video marketing expert
- Kimberly Ann Jimenez - Digital marketing strategist
For aspiring YouTube creators looking to learn more about video production and editing, check out our How to Make YouTube Videos educational resources and enhance your editing skills.
By utilizing Camtasia's powerful editing features and incorporating these tips into your video editing workflow, you can create polished and engaging YouTube content that keeps viewers coming back for more.
Final Cut Pro X is a professional video editing software produced by Apple Inc., which has become a popular choice for YouTube creators. In this section, we will discuss the features and capabilities of Final Cut Pro X, its pricing, and how to effectively use it for creating YouTube content.
Features and Capabilities
Final Cut Pro X offers numerous features for video editing, including a magnetic timeline, 360° video editing, advanced color grading, support for HDR video, and simultaneous sharing across multiple platforms. It also provides a wide range of transitions, effects, and text generators that can be easily added to your videos. Its interface is designed for both beginners and professionals, allowing easy access to essential tools and features.
Pricing
Final Cut Pro X costs $299.99 for a one-time purchase, which includes free updates. It is available for macOS devices only.
Do's:
- Make use of the magnetic timeline, which allows you to easily trim, move, or ripple clips without creating gaps or overlaps.
- Take advantage of Final Cut Pro X's advanced audio editing capabilities, such as using multiple audio lanes, audio sync, or the audio analysis tool for enhancing the sound quality of your videos.
- Utilize the vast collection of built-in titles, effects, and transitions to create professional-looking videos.
Don'ts:
- Don't overlook the importance of organizing your media library, using keywords, and creating smart collections for easier access and editing.
- Avoid using too many effects or transitions that could distract viewers from the content of your video.
- Don't ignore updates: regularly updating the software will provide you with new features and enhanced performance.
Casey Neistat, a famous YouTuber renowned for his artistic and engaging video content, has been known to use Final Cut Pro X for his video editing. His visual storytelling techniques and expert utilization of the software demonstrate the endless possibilities for creating high-quality content on YouTube.
Whether you are new to video editing or a seasoned professional, Final Cut Pro X can help elevate your YouTube content. For additional resources on how to make YouTube videos, explore the online courses and educational materials available to enhance your skills.
Best Paid YouTube Video Editors
Sony Vegas Pro
Sony Vegas Pro, now named "Vegas Pro," is a popular video editing software used by YouTubers and professional video creators alike. In this section, we will discuss the various features, benefits, use cases, and strategies for using Vegas Pro to edit your YouTube videos.
Overview of Vegas Pro
Vegas Pro offers a range of powerful video editing tools and features that make it an ideal choice for YouTube content creators looking for a professional editing solution. Some of the most notable features include:
- A user-friendly and customizable interface
- Support for a wide range of video formats and resolutions
- Advanced video effects and filters
- Comprehensive audio editing tools
- Integrated motion tracking and stabilization
- Multicam editing capabilities
- 3D video editing support
^(Reference: Vegas Pro Official Website
- Efficient Workflow: Vegas Pro's intuitive interface and customizable workspaces allow users to work efficiently and tailor the software to their specific editing needs. This efficiency leads to quicker turnaround times for video production.
- High-Quality Output: Vegas Pro supports a wide range of video formats and resolutions, including 4K, which allows users to create high-quality content for their YouTube channel.
- Advanced Editing Tools: With extensive video effect libraries, audio editing tools, and motion tracking features, users can create polished and professional-looking videos that stand out on the platform.
Several successful YouTubers use Vegas Pro to edit their videos, including Nexus and Surfaced Studio. These creators use the software to produce a variety of content, from short films and gameplays to educational tutorials, demonstrating the software's versatility and suitability for different content types.
Tips and Best Practices
- Customize Your Workspace: To maximize efficiency, take advantage of Vegas Pro's customizable workspaces. Arrange the editing tools in a manner that suits your workflow.
- Utilize Keyboard Shortcuts: Learning and using keyboard shortcuts can significantly speed up the editing process. Familiarize yourself with the most common shortcuts and practice using them.
- Optimize Your Rendering Settings: To ensure the best possible video quality, adjust your rendering settings in accordance with YouTube's recommended upload encoding settings [^(Reference: YouTube Help].
- Stay Updated: Keep your software up-to-date to ensure you always have access to the latest features and performance improvements.
Vegas Pro Pricing
Vegas Pro offers three pricing tiers:
- Vegas Pro Edit: $399
- Vegas Pro: $599
- Vegas Pro Suite: $799
Each tier grants access to additional software, features, and plugins that further enhance your video editing capabilities. It is essential to choose the tier most suitable for your editing needs and budget. You can consider starting with the free 30-day trial, which allows you to test out the software's features before purchasing a license. [^(Reference: Vegas Pro Official Website].
Features and Functions of YouTube Video Editors

 Justin Brown - Primal Video
Audio Editing on YouTube
Audio editing is an essential component of video creation on YouTube, as it enhances the overall quality of the content and promotes a more engaging viewing experience for audiences. In this section, we will explore the features and functions of YouTube video editors in terms of audio editing, examine various techniques for optimizing audio, and share some useful tools to facilitate this process.
Importance of Audio Editing
Audio quality plays a crucial role in a viewer's experience as they watch a video. Statistically, viewers are more likely to tolerate low-quality visuals than poor audio. A survey conducted by The Diffusion Group revealed that 60% of the participants considered audio quality to be more important in online videos than video quality.
YouTube's Built-in Audio Editor
YouTube Studio offers a built-in audio editor that can help creators make basic adjustments to the audio in their videos. Key features include:
-
Adjusting the volume of the audio track
-
Reducing background noise
-
Do: Normalize audio levels to ensure consistency across the entire video
-
Do: Remove any background noise or unwanted sounds
-
Do: Use royalty-free music and sound effects to avoid copyright strikes
-
Don't: Use copyrighted music without permission, as this may lead to a YouTube copyright strike
-
Don't: Overuse sound effects or music, as it may distract your audience from the main content
Useful Tools for Audio Editing
Apart from YouTube's built-in audio editor, there are many third-party tools available to provide more advanced features and capabilities. Some popular options include:
- Audacity: A free, open-source audio editing software
- Adobe Audition: A professional audio editing suite
- GarageBand: A convenient audio editing tool for macOS and iOS users
Audio Editing Techniques to Improve Video Quality
- Utilize noise reduction tools to minimize background noise
- Equalize audio frequencies to achieve a balanced sound
- Compression can help produce a more consistent audio level
- Utilize panning to create a more immersive audio experience
Color Correction
Importance of Color Correction in YouTube Video Production
Color correction is a crucial aspect of YouTube video production, as it ensures visual consistency, enhances mood and emotions, and helps create a distinctive look for your video content. High-quality color correction highlights the creative vision of the video creator, ultimately leading to increased views, watch time, engagement, and YouTube channel growth.
Basic Color Correction Techniques
Adjusting color balance, exposure, contrast, and saturation are some basic techniques that can dramatically improve the appearance of your videos:
- Color Balance: Adjust color temperature (warm or cool) and tint (green or magenta) to achieve natural and pleasing colors.
- Exposure: Adjust overall exposure to ensure proper brightness levels throughout the footage.
- Contrast: Increase or decrease contrast to add depth and texture to your videos.
- Saturation: Adjust saturation levels to make colors more vivid or subdued, depending on the desired mood and style.
YouTube Video Editors with Color Correction Features
Several video editing software solutions offer excellent color correction tools. A few popular options include:
- Adobe Premiere Pro
- DaVinci Resolve
- Final Cut Pro X
- Filmora X
Find more information on video editing software for YouTube.
Color Grading vs Color Correction
While color correction focuses on fixing color and exposure issues to achieve natural and accurate colors, color grading is an artistic process that aims to give videos a unique and stylized look. By applying color grading techniques, you can create a specific mood, evoke emotions, or match the visual style of other related videos.
Tips for Effective Color Correction
- Shoot in a flat profile: Capture footage with a flat color profile to achieve more flexibility while color correcting and grading in post-production.
- Use scopes and color correction tools: Utilize RGB Parade, Waveform, and Vectorscope to guide your color correction adjustments.
- Trust your eyes: While scopes are essential for accurate adjustments, use your vision to make final decisions based on your creative vision.
- Keep it subtle: Avoid over-processing the footage, and maintain a natural look unless a specific visual effect is desired.
- Match shots: Ensure that different shots within a scene have consistent colors and lighting for a seamless viewing experience.
Learning Color Correction Skills
Mastering color correction skills can significantly elevate the quality of your YouTube videos. Several online courses and educational resources address color correction, helping you learn essential techniques, build a solid foundation, and eventually become proficient in the art of color correction.
Features and Functions of YouTube Video Editors YouTube Green Screen (Chroma Key)
Utilizing green screen technology, also known as chroma key, can significantly enhance your YouTube videos by allowing you to seamlessly replace the background or specific objects in your video. This guide will discuss the benefits and methods for using the chroma key technology while creating content for your YouTube channel.
Why Use Green Screen (Chroma Key)?
YouTube creators often use green screens to:
- Add interesting backgrounds or effects to their videos
- Enhance the professionalism of their content
- Save time and resources by avoiding the need to shoot in certain locations
- Stand out among their competitors and create unique, and visually engaging videos
Using Chroma Key Important Tips and Considerations
Here are some crucial factors to consider while using chroma key technology with YouTube video editors:
Choosing a Proper Green Screen Material
Invest in a high-quality green screen material to ensure the best results. A good green screen will be evenly lit and wrinkle-free. Some popular options include:
- Elastin fabric, which is crease-resistant and provides a smooth surface
- Foldable green screens, which can be easily stored when not in use
- Paintable green screen materials, which can be applied directly onto walls or other surfaces
Lighting Your Green Screen Effectively
Proper lighting is crucial for achieving a successful chroma key effect. Here are a few lighting tips:
- Illuminate the green screen evenly without any shadows, using soft-diffused light sources
- Use separate lights for your subject to prevent shadows and spillover from the green screen
- Maintain a consistent distance between the subject and the green screen to avoid shadows and make the keying process easier
Choosing the Right Video Editor for Chroma Key
Numerous video editors support chroma key effects. Some popular options for YouTube creators include:
- Adobe Premiere Pro
- Final Cut Pro X
- Sony Vegas Pro
- DaVinci Resolve
- HitFilm Express
Keep in mind that some video editors may require more advanced knowledge to utilize chroma key effectively.
Editing the Chroma Key Effect
Once you have filmed your scene with the green screen, import it into a video editor that supports chroma key effects. Follow these general steps:
-
Create a new video layer with the green screen footage
-
Apply the chroma key effect with your video editor's tools
-
Use the editor's color picker to select the green color in your footage
-
Adjust settings such as edge smoothing, spill reduction, and feathering to create a clean, seamless result
-
Add your desired background in a separate video layer underneath your keyed footage
-
Do experiment with different green screen materials and setups to find what works best for your studio
-
Don't use clothing, objects, or backgrounds that are the same color as your green screen—this will cause issues during the keying process
-
Do research and learn the specifics of chroma key effects in your chosen video editor
-
Don't skimp on proper lighting for your green screen setup—good lighting is crucial for a successful chroma key effect
-
Do practice and refine your chroma key skills regularly to create polished and professional-looking videos
By following these guidelines and utilizing chroma key technology, you can create eye-catching and engaging content for your YouTube channel. Remember that practice and experimentation are the keys to perfecting your chroma key skills, so don't be afraid to try new things and learn from your mistakes. Happy editing!
Features and Functions of YouTube Video Editors
Text and Titles
Importance of Text and Titles in YouTube Videos
Effective use of text and titles in YouTube videos can help creators improve their video's overall performance. Text and titles are essential in creating a cohesive narrative, highlighting crucial information, and making videos more accessible to a broader audience through closed captions. They also help with SEO and allow easier discoverability of content.
Best Practices for Text and Titles
a) Text and Titles should be Clear and Concise
Text and titles should be short, easy to read, and understand. Overloading text and titles can overwhelm viewers, leading to decreased engagement.
b) Use an Appropriate Font
Choose a font that is easy to read and consistent with your brand. Popular font choices include Arial, Helvetica, and Verdana. Avoid using overly decorative fonts that can be challenging to read on different screen sizes.
c) Use Proper Formatting
Proper formatting and typography help improve readability and maintain a professional appearance. Ensure text is correctly aligned, and use appropriate line spacing and capitalization.
d) Use Dynamic Text
Using dynamic text, such as animating titles or having text fade in and out, can help keep viewers engaged throughout your video. This technique works exceptionally well in explainer videos or tutorials.
e) Ensure Accessibility
Include closed captions or subtitles to make your content accessible to viewers who are deaf or hard of hearing. Additionally, captions can be beneficial for viewers who are viewing the video in a noisy environment or a language they are not fluent in.
Text and Titles Usage in Popular Videos
- How to Make YouTube Videos: An educational channel that uses clear and informative title sequences, text overlays, and annotations to provide guidance and context throughout its videos, ensuring high viewer engagement.
- Vlog Channels: Vloggers often use text and titles to emphasize particular moments, provide context or serve as humorous asides.
Text and Titles in YouTube Analytics
YouTube Analytics provides insights into how well your text and titles are performing. Metrics to track include:
a) Click-through Rate (CTR)
CTR indicates the percentage of users who click on your video's thumbnail after seeing it. A compelling title and relevant thumbnail can significantly impact your video's CTR.
b) Audience Retention
Viewers are more likely to continue watching your video if you use informative titles and clear text to keep them engaged.
Common Mistakes to Avoid
- Overloading with Text and Titles: Do not overwhelm viewers by using too much text and multiple title overlays. Keep things simple and to the point.
- Difficult to Read Fonts: Choose a font that is clear and easy to read, avoiding overly stylized or decorative fonts that can hinder readability.
- Poor Formatting: Ensure that your text is formatted appropriately. Align text correctly, use proper capitalization, and avoid inconsistent typography.
By applying these best practices and avoiding common mistakes, creators can ensure their content stays engaging and accessible to their target audience. Remember to track your performance using YouTube Analytics and continuously learn and optimize your videos' text and titles.
Features and Functions of YouTube Video Editors
Timeline Editing
Timeline editing is a crucial component of video editing, particularly in the realm of YouTube content creation. This section will explore the features and functions of YouTube video editors in relation to timeline editing, shedding light on the various tools and techniques that professionals and aspiring creators can utilize for producing engaging content.
The Importance of Timeline Editing
Timeline editing involves arranging and manipulating video clips, audio, and other multimedia elements in a linear fashion to create a coherent narrative. It plays a significant role in crafting the final product and dictating the flow, pacing, and overall tone of your YouTube video. In fact, according to a study by Forbes, 64% of customers are more likely to buy a product online after watching a video about it. As a result, possessing strong timeline editing skills directly contributes to the success and growth of a YouTube channel.
Key Features of Timeline Editing in YouTube Video Editors
-
Clip Trimming and Splitting: Most YouTube video editors allow for easy trimming and splitting of video clips, enabling creators to eliminate unwanted or unnecessary portions of their footage.
-
Transitions and Effects: Video transitions smooth the movement between different clips on the timeline. Popular transition styles include dissolves, wipes, and fades. Additionally, video editors can add effects like color grading, text overlays, and green screen composition.
-
Audio Mixing and Editing: Equally important as the visuals, audio mixing entails adjusting volume levels, equalization, and pan settings to create a balanced and pleasant sonic experience for the viewer.
-
Keyframe Animation: Keyframes enable creators to add movement and animation to elements within their videos, such as text, images, and video clips.
-
Layering and Compositing: Layering, also known as compositing, allows for the combination of multiple video and audio tracks, thereby providing a more dynamic visual and auditory experience.
Do's
- Maintain a clear organization of your project files and timeline.
- Use keyboard shortcuts to speed up the editing process.
- Edit to the beat of the background music to create a more engaging experience.
- Employ J and L cuts to smooth out audio and video transitions.
- Continually save your project as you edit.
Don'ts
- Overuse transitions and effects, as this can lead to a cluttered viewing experience.
- Rely solely on automatic editing tools – manual adjustments can help fine-tune your final product.
- Neglect audio levels, as poor audio quality can be a significant turnoff for viewers.
Enhancing Your Timeline Editing Skills
Improving timeline editing skills requires time, practice, and patience. Creators should continuously explore various resources to stay updated on the latest techniques and industry trends. Online courses and educational resources like here often provide a wealth of information on how to make YouTube videos with improved editing skills.
Features and Functions of YouTube Video Editors
Transitions and Effects
Transitions and effects are powerful ways to enhance the visual storytelling of your YouTube videos, making them more engaging and professional. A well-chosen transition can seamlessly shift between scenes, while a creative effect can add a unique style, mood, or pace to your content.
Popular Types of Transitions and Effects
-
Dissolve: The dissolve transition gradually fades out the first scene while fading in the next, creating a smooth visual blend. This is particularly useful for indicating a change in time or location within your video.
-
Wipe: A wipe transition involves one scene appearing to "push" the other off-screen. It can be done in various directions and styles, such as a clock wipe or linear wipe.
-
Zoom In/Out: A zoom transition simulates the camera lens zooming in or out from one scene to the next.
-
Color Correction: Color correction effects help improve the visual quality of your video footage, adjusting colors, brightness, and contrast to achieve a more desirable look.
-
Text and Titles: Adding text, captions, or titles to your video can provide additional context or information for your viewers.
-
Green Screen/Chroma Key: This effect allows you to remove a green background from your video footage and replace it with a different scene or background.
-
Do use transitions and effects purposefully, enhancing your content and storytelling.
-
Don't overuse transitions and effects, as they can become confusing or overwhelming for viewers.
-
Do use the right transition or effect for the right moment, considering the overall theme and mood of your video.
-
Don't use low-quality or outdated effects, which can significantly decrease the overall quality of your video.
-
Do explore how to make YouTube videos and learn about the art of utilizing transitions and effects effectively.
Using YouTube Video Editors for Transitions and Effects
Many video editing software programs, such as Adobe Premiere Pro, Final Cut Pro, and Filmora, provide a wide range of transitions and effects for YouTube creators to use within their videos. These tools can help you incorporate stunning visual elements into your content.
Whether creating educational tutorials, cinematic vlogs, or entertaining skits, you should not underestimate the power of transitions and effects in your YouTube videos. These visual elements, when used correctly, can greatly enhance your content's engagement, viewability, and overall production quality. By mastering the use of transitions and effects within your YouTube video editor, you'll be better equipped to captivate and retain your audience's attention.
Video Export Options
After you've finished editing your YouTube video, it's crucial to properly export it. Choosing the right settings will ensure that your video looks sharp and plays smoothly on various devices and platforms. In this section, we'll discuss the various YouTube video export options and suggest some helpful tips for exporting high-quality videos.
Popular File Formats
When exporting videos for YouTube, it's important to choose the right file format. Some popular formats include:
- MP4: Supported by nearly all devices and platforms, MP4 files offer excellent video quality while maintaining relatively small file sizes.
- MOV: Created by Apple, this format is compatible with YouTube but may not be supported by all devices.
- AVI: This is an older format that can result in large file sizes and may not be supported by all devices.
- FLV: Generally not recommended, as this format is outdated and unsupported by many modern devices.
It's best to stick with MP4 for maximum compatibility and quality.
Resolution and Frame Rate
The resolution and frame rate of your video will directly impact its visual quality. Here are some common settings and their recommended uses:
- 1080p (1920x1080) at 24 or 30 fps: Suitable for most videos, provides good quality while keeping file sizes manageable.
- 4K (3840x2160) at 24 or 30 fps: Ideal for high-end videos with lots of detail, but may result in long upload times due to large file sizes.
- 720p (1280x720) at 60 fps: Useful for gaming videos or other content where smoother motion is beneficial.
YouTube supports resolutions up to 8K, but keep in mind the increased file size and processing time when uploading larger videos.
Bitrate and Compression
Higher bitrates result in better video quality but larger file sizes. YouTube has guidelines for recommended bitrates for different resolutions and frame rates, which can help you make the best decision based on your video content.
It's also essential to use proper compression settings to minimize artifacts and maintain video quality. Most editing software offers presets optimized for YouTube, which can simplify the process.
Audio Quality
Don't forget to pay attention to the audio quality in your videos. YouTube recommends an audio bitrate of at least 128 kbps (AAC) for standard audio and up to 384 kbps for high-quality stereo audio.
Exporting Tips and Best Practices
-
Always double-check your export settings before proceeding to avoid mistakes and re-exports.
-
Use editing software presets optimized for YouTube when available.
-
Consider uploading your video at off-peak hours to minimize upload times.
-
Make sure your video doesn't contain any copyrighted content (music, visuals, etc.) to prevent YouTube copyright strikes.
-
Adobe Premiere Pro: H.264 YouTube 1080p Full HD preset
-
Final Cut Pro: H.264 Web Hosting YouTube & Facebook preset
-
Davinci Resolve: YouTube 1080p preset
To further enhance your YouTube content and grow your channel, consider exploring other resources on how to make YouTube videos available through our website.
Video Stabilization on YouTube
Video stabilization is crucial for enhancing the quality of your YouTube content. Shaky footage can be distracting and unprofessional, which may impact audience retention and overall viewing experience. YouTube's video editor offers built-in stabilization tools that can help you achieve a smoother, more professional video.
Importance of Video Stabilization
- Reduces the impact of camera shake, improving overall video quality
- Makes videos more enjoyable to watch and less distracting for viewers
- Can improve viewer retention rates
YouTube's Built-in Video Stabilization Tool
How It Works
YouTube's video stabilization tool analyzes your footage frame by frame and smooths out shaky camera movements. It does this by cropping and repositioning the video in a way that minimizes camera shake.
Pros
- Easy to use, as it is built into YouTube's video editor
- Can improve the overall quality of your video content
- No additional software required
Cons
- May cause minor distortion or warping of the video
- Some detail may be lost due to cropping
How to Stabilize Your Video on YouTube
- Sign in to your YouTube account and go to the YouTube Studio.
- Navigate to the "Content" tab and find the video you want to stabilize.
- Click on the thumbnail or title of the video to open the video details page.
- Go to the "Editor" tab on the left side of the page.
- On this page, you'll find the "Stabilize" option under the "More options" dropdown menu.
- Click on the "Stabilize" button to apply video stabilization.
- Review the stabilized video in the preview window.
- If satisfied with the results, click "Save" to apply the changes to your video.
Note: Stabilizing large or long videos may take some time.
Other Video Stabilization Options
If you're looking for more advanced video stabilization options, consider using third-party software like Adobe Premiere Pro, Final Cut Pro, or DaVinci Resolve. These professional-grade programs provide more precise control over video stabilization, allowing you to achieve even smoother footage. You can learn more about these programs and other video editing tools.
Additional Tips
- When filming your video, use camera stabilization tools like tripods, gimbals, or shoulder rigs to minimize camera shake during recording.
- For smoother footage, use cameras with built-in optical or digital image stabilization features.
- If your video stabilization adjustments compromise the video quality, consider reshooting the scene with better stabilization techniques.
Tips and Tricks for Efficient Video Editing
- Batch Editing and Templates
- Creating Consistent Branding
- Keyboard Shortcuts
- Organizing Media Files
- Reusing and Repurposing Video Content

Film Booth
Tips and Tricks for Efficient Video Editing
Batch Editing and Templates
Batch editing is the process of editing multiple videos or project files simultaneously, resulting in a more streamlined workflow. This method has several benefits:
- Time efficiency: Batch editing allows creators to work on multiple projects at once, reducing the time spent on repetitive tasks.
- Consistency: Editing in batches ensures a unified look and feel across your content, maintaining a strong brand identity.
- Reduced burnout: The organization and efficiency of batch editing can help prevent creator burnout.
- Easier content management: Batching helps you plan and schedule content effectively, providing a more structured approach to video production.
- Intro/Outro Templates: These premade templates include a standard introduction and closing for your videos, complete with animations, social media icons, and a call-to-action (CTA).
- Text and Title Templates: These customizable templates offer various fonts, colors, and styles for text overlays on your videos. Consistent use helps strengthen your brand identity.
- Thumbnail Templates: Customizable templates for YouTube thumbnails can ensure consistency and high-quality design across your channel.
- Transitions and Animation Templates: Pre-made animations or transitions that enhance your videos and maintain a polished, professional look.
Do's of Batch Editing and Templates
- Plan and Organize: Before starting, plan your video content, create a schedule, and gather all necessary assets to streamline batch editing.
- Use the Right Software: Select video editing software that supports batch editing and template use.
- Create a Custom Template Library: Organize your templates based on their purpose, e.g., Thumbnails, Text Overlays, or Transitions.
- Stay Consistent: Ensure the templates you select or create maintain a consistent look, feel, and design that aligns with your brand identity.
- Learn and Evolve: Keep up with YouTube creator news to stay updated on the latest industry trends and best practices.
Don'ts of Batch Editing and Templates
- Avoid Overuse: Relying too heavily on templates can lead to content that feels generic or formulaic. Add your unique touches to ensure originality.
- Don't Skimp on Quality: Templates can save time, but they shouldn't replace quality editing. Allocate appropriate resources to get the polished results your channel deserves.
- Avoid Excessive Repetition: While consistency is essential, using the same templates and patterns repeatedly can become monotonous. Make subtle changes and updates to keep your audience engaged.
- Don't Shortcut Thumbnail Design: Your video thumbnail is prime real estate for attracting views, so don't rely solely on templates. Invest in high-quality, customized thumbnail designs that capture attention.
By incorporating batch editing and templates into your video creation process, you'll save time, improve consistency, and enhance your overall content quality. Keep the above tips in mind, and you'll find yourself with an efficient and effective workflow on your way to YouTube success!
Creating Consistent Branding
Creating consistent branding is crucial for the success of your YouTube channel. It helps your content to be easily recognized by your audience and ensures a professional look that boosts your credibility. This section will cover essential aspects of branding on YouTube, including channel art, thumbnails, intro and outro sequences, as well as watermark and video overlays, along with best practices to follow.
Channel Art
Your channel art is the first visual element that viewers see upon visiting your channel. It's essential to have a design that accurately represents your brand and content.
Do's:
- Use high-quality images that look good on all devices.
- Include your logo, channel name, tagline, and any relevant graphics that reflect your content.
- Use consistent colors and fonts that align with your brand identity.
Don'ts:
- Use low-quality images that appear pixelated or stretched.
- Overload your banner with text or visuals, making it cluttered and difficult to read.
- Use images or fonts that are difficult to read or unrelated to your content and brand.
Thumbnails
Thumbnails play a crucial role in attracting viewers to click on your video. A consistent thumbnail style will help your content stand out and become more recognizable.
Do's:
- Create custom thumbnails that are visually appealing and reflect the video content.
- Use a consistent color scheme, fonts, and imagery that define your brand.
- Use high-resolution images or screenshots from your video.
- Include text or titles that accurately represent the video content and are easy to read.
Don'ts:
- Use default thumbnails generated by YouTube.
- Use unrelated or misleading images and text.
- Use low-quality images or text that are difficult to read.
Intro and Outro Sequences
Establishing a consistent intro and outro sequence for your videos helps build brand recognition and establish a unique identity for your content.
Do's:
- Keep intro sequences short and focused, usually around 5-10 seconds.
- Include your logo, channel name, and a tagline or hook that represents your content.
- Use a consistent background, music, and animation style to create a distinct identity.
Don'ts:
- Have long and repetitive intros that may cause viewers to leave.
- Use generic intro templates that do not align with your brand's aesthetic.
- Include unrelated or distracting visual or audio elements.
Watermark and Video Overlays
Adding a watermark to your videos helps protect your content and assert your brand's identity. Video overlays such as title cards and end screens help keep your content cohesive and professional.
Do's:
- Use a watermark that reflects your brand identity, such as your logo or channel name.
- Design end screens that align with your brand's aesthetic and guide viewers to more of your content.
Don'ts:
- Use distracting or unrelated watermarks that may detract from your content.
- Overload your video with unrelated or overpowering overlays that may confuse or annoy viewers.
Creating consistent branding across your YouTube channel will help establish your presence and make your content memorable and easily recognizable. For more ideas and inspiration on how to make YouTube videos, visit how to make YouTube videos.
Tips and Tricks for Efficient Video Editing
Keyboard Shortcuts
When it comes to video editing, efficiency is key. One way to speed up your editing process is by utilizing keyboard shortcuts. In this section, we will discuss various keyboard shortcuts that can help you save time during video editing, as well as the benefits of using these shortcuts in your workflow.
- Speed: Keyboard shortcuts allow you to perform tasks quicker than using a mouse, reducing the time spent on editing.
- Precision: Many shortcuts enable greater precision in your edits, such as skipping frame by frame or trimming clips with exact timing.
- Workflow: Keyboard shortcuts enhance the overall workflow by reducing distractions and minimizing the need to navigate through menus.
Essential Keyboard Shortcuts for Video Editing
Here are some common keyboard shortcuts for various video editing software:
Adobe Premiere Pro
-
I and O: Set in and out points for a clip.
-
J, K, and L: Shuttle through your timeline (playback at different speeds).
-
C: Razor tool to make cuts in the timeline.
-
V: Selection tool to move and manipulate clips in the timeline.
-
CMD/CTRL + K: Add edit or cut at the playhead location.
-
I and O: Set in and out points for a clip.
-
J, K, and L: Shuttle through your timeline (playback at different speeds).
-
B: Blade tool to make cuts in the timeline.
-
A: Selection tool to move and manipulate clips in the timeline.
-
CMD + B: Add edit or cut at the playhead location.
While these shortcuts are specific to Adobe Premiere Pro and Final Cut Pro, many keyboard shortcuts are universal across various video editing software, such as play, pause, and nudge.
Customizing Your Keyboard Shortcuts
Most video editing software allows you to customize your keyboard shortcuts to fit your preferred layout and workflow. Consult your software's manual or settings menu to learn how to edit your shortcuts.
Moreover, you can create keyboard shortcuts for frequently used functions that might not have a default shortcut assigned.
Practice Makes Perfect
In order to make the most out of keyboard shortcuts, practice using them consistently in your video editing process. Over time, you will build muscle memory and increase your overall efficiency in editing.
By implementing these keyboard shortcuts and customizing them to fit your workflow, you can significantly improve the speed and efficiency of your video editing. Consider exploring more advanced shortcuts and tools within your video editing software, as well how to make YouTube videos more effectively and engaging.
Image Source: Lightworks Editor
Tips and Tricks for Efficient Video Editing
Organizing Media Files
- According to a 2019 report, ineffective file management can waste up to 21% of your workday.
- A study by Enterprise Storage Forum found that 65% of companies surveyed recognized data organization as their top data management challenge.
-
Create a central folder for all your project files.
-
Separate raw footage, audio, graphics, and other assets into their respective folders.
-
Use a consistent naming convention for your files and folders, such as "Project_Title_YYMMDD."
-
Implement a versioning system for edited files, such as "Project_Title_v1" and "Project_Title_v2."
-
Use metadata and file tags for better searchability.
-
Central folder: "My_YouTube_Projects"
-
Subfolders: "Raw_Footage", "Audio", "Graphics", "Rough_Cuts", "Final_Versions"
-
File naming: "Travel_Vlog_2101", "Product_Review_2102", "Behind_the_Scenes_2102"
Do's:
- Do create a standardized structure for all your projects.
- Do maintain a backup of your files, either on an external hard drive or a cloud storage service.
- Do delete or archive unused files regularly to save storage space.
Don'ts:
- Don't mix personal files and project files in the same folder.
- Don't use vague or generic file names.
- Don't rely solely on your memory to remember where files are located.
Having an organized media file system can significantly increase your video editing efficiency and overall productivity. By following the tips and best practices mentioned above, you'll be able to focus more on creating high-quality content for your YouTube channel.
For more information on making YouTube videos, check out our guide on how to make YouTube videos.
Tips and Tricks for Efficient Video Editing
Reusing and Repurposing Video Content
Reusing and repurposing video content is a great way to maximize the value of your existing videos, saving time, effort, and resources while providing fresh content consistently to your viewers.
- 85% of Facebook videos are watched without sound, making repurposed content for silent autoplay an excellent strategy .
- YouTube videos generate 27,7 billion views in the month of April 2021, showing an immense potential audience for repurposed content .
- Highlight Reels: Compile the best moments from your previous videos into a new video, bringing together the most engaging content.
- Social Media Teasers: Edit video clips into shareable snippets for platforms like Instagram or Twitter to promote your YouTube channel.
- Behind-the-Scenes Content: Show your viewers what goes into making your videos with footage shot during production.
- Video Podcast: Transform a series of related videos into an audio podcast format for easy listening.
- In-video Overlays: Utilize fragments from older videos as overlays or Pop-ins to provide relevant context and information to your audience.
Do's
- Ensure compatibility: Tailor repurposed content to fit the format and style of the platform you're sharing it on.
- Refresh outdated content: Update your older videos before reusing them, ensuring that the information is still relevant for your audience.
- Give credit: If you are using someone else's content, ensure you have the rights to reuse it and provide proper credit to avoid any YouTube copyright strikes.
Don'ts
- Don't dilute your brand: Repurpose content that remains in line with your channel's theme and overall brand identity.
- Don't spam: Avoid overuse of repurposed content, striking a healthy balance between new and repurposed material to keep your audience engaged.
- Don't sacrifice quality: Ensure that the repurposed content is as high quality as your original content to maintain the professional image of your channel.
Additional Resources
- Learn how to make YouTube videos with these online courses and educational resources.
- Find the best tools for YouTube creators to help you repurpose video content efficiently.
Tutorials and Learning Resources for YouTube Video Editors
- Key Statistics
- Top Online Community Forums for YouTube Video Editors
- Chart Top Topics Discussed by YouTube Video Editors in Online Communities
- Official User Guides and Manuals
- YouTube Channels and Online Tutorials

 Aprilynne Alter
Community Forums and Social Media Groups
Getting access to the right set of information and people can be essential for success on YouTube. In this section, we will discuss various community forums and social media groups relevant to YouTube video editors. These online communities can help you to learn new editing techniques, discover emerging tools and share your personal experiences.
Key Statistics
Some key data points about the importance of participating in online communities:
- 90% of users stated that online communities play a significant role in shaping their purchasing decisions .
- 71% of consumers who have a positive experience in a social media group are more likely to recommend it to others .
Top Online Community Forums for YouTube Video Editors
-
YouTube Creators Forum
-
Video Editing Subreddit (/r/VideoEditing) 3.YouTube Video Editing Facebook Group
-
Adobe Premiere Pro Community Forums
-
Final Cut Pro X Community Forums
-
Avid Media Composer Community Forums
-
Learn from experienced members
-
Access tutorials and resources
-
Receive guidance and mentorship
-
Share your own work and receive feedback
-
Network and collaborate with like-minded creators
-
Asking for feedback on a new editing technique or effect
-
Requesting help in troubleshooting an issue with editing software
-
Promoting a tutorial or resource you've created or discovered
Do's
- Be respectful and courteous to other community members
- Contribute value by sharing resources and helping others
- Engage in discussions and ask for assistance when needed
Don'ts
- Spam or self-promote without providing value
- Disrespect other members or engage in personal attacks
- Share copyrighted materials or be involved in piracy
Chart Top Topics Discussed by YouTube Video Editors in Online Communities
- Editing software (45%)
- Tutorials and learning resources (30%)
- Troubleshooting software issues (15%)
- Sharing personal work and getting critiques (10%)
Tutorials and Learning Resources for YouTube Video Editors
Official User Guides and Manuals
Being proficient in YouTube video editing is vital for creating engaging and high-quality content for your viewers. This section covers Official User Guides and Manuals available for video editing software used by YouTube creators. It also provides valuable resources, from basic tutorials to advanced techniques, ensuring your editing skills improve with each passing day.
- YouTube is the second mostpopular website globally, which showcases the importance of quality content creation.
- Creators who use better video editing skills tend to have higher audience retention rates.
Resources and Guides
- Adobe Premiere Pro – Official User Guide
- Final Cut Pro – Official User Guide
- Davinci Resolve – Official Training Manual
- Sony Vegas Pro – Official User Guide
Table 1. Official guides and manuals for popular video editing software
-
PewDiePie – Known for his energetic editing style, PewDiePie is one of the most successful YouTubers, with over 110 million subscribers.
-
Peter McKinnon – A professional videographer and content creator, Peter McKinnon's channel is filled with useful tips and tutorials for video editors of all levels.
-
Do study and implement tips and techniques from official guides and manuals.
-
Do invest time in learning and practicing video editing to ensure the best content quality.
-
Do explore various video editing software to find the one best suited to your workflow and requirements.
-
Do learn from other successful YouTubers and apply their techniques to your editing process.
-
Don't infringe on copyrighted material when using footage, music, and sound effects. Learn about YouTube copyright strike and abide by it.
-
Don't neglect learning new techniques and tools available in your editing software to stay up to date with innovations and trends.
┌──────────────────────┬────────────┬──────────────────┬────────────────┐ │ Software │ Popularity │ Official Guide │ Learning Curve │ ├──────────────────────┼────────────┼──────────────────┼────────────────┤ │ Adobe Premiere Pro │ High │ Available │ Moderate │ │ Final Cut Pro │ High │ Available │ Moderate │ │ Davinci Resolve │ Moderate │ Available │ Advanced │ │ Sony Vegas Pro │ Low │ Available │ Moderate │ └──────────────────────┴────────────┴──────────────────┴────────────────┘
Table 2. Overview of popular video editing software for YouTube creators
Links and Additional Resources
- How to Make YouTube Videos – Discover our guide on creating compelling content for your channel, including video production and editing tips.
- YouTube Video Editing – Explore more resources and tools to help you edit videos like a pro, including software, royalty-free music, stock footage, and more.
- Best Channels, Websites, and Newsletters for YouTube Creator News – Stay up-to-date with the latest tips and news concerning YouTube creators by subscribing to relevant newsletters and following informative channels.
By learning from Official User Guides and Manuals, as well as supplementary resources, you can develop your video editing skills and create fascinating content that resonates with your audience. Make sure to consistently update your knowledge and techniques within this domain to stay ahead and produce the best content available online.
Tutorials and Learning Resources for YouTube Video Editors
YouTube Channels and Online Tutorials
In this section, we will be diving into various YouTube channels and online tutorials focused on guiding aspiring video editors on creating flawless content for YouTube. With the help of these resources, you will be equipped with essential knowledge and skills, from basic editing techniques to the use of advanced editing software.
Top YouTube Channels for Video Editing Tutorials
- Justin Brown - Primal Video - Justin Brown covers topics ranging from video editing software fundamentals to more advanced techniques for getting the most out of your editing software.
- Cinecom.net - This channel includes a wealth of tutorials on filmmaking, video editing, and visual effects, making it an excellent choice for users looking to level up their video production skills.
- Video Copilot - Specializing in Adobe After Effects tutorials, Video Copilot offers high-quality visual effects and motion graphics tutorials suited for advanced users.
Popular Editing Software Tutorials
In addition to YouTube channels, there are a plethora of software-specific tutorials available on various online platforms.
- Adobe Premiere Pro: Adobe's official Premiere Pro Tutorials
- Final Cut Pro X: Apple's official Final Cut Pro X documentation and tutorials
- DaVinci Resolve: Blackmagic Design's official DaVinci Resolve training videos
Best Practices
Here are some best practices to take into account you embark on your editing journey:
- Organize your footage and project files for easy access.
- Edit for the story - always prioritize storytelling in your editing process.
- Maintain consistency in pacing, sound, and color.
- Don't go overboard with visual effects - use them to enhance the story, not distract from it.
Do:
- Trim and cut your clips to remove unnecessary footage or mistakes.
- Use keyboard shortcuts to speed up your editing process.
- Experiment with different editing techniques to find your unique style.
- Backup your project files regularly.
Don't:
- Rely solely on transitions to carry your story.
- Overuse effects or filters that distract from your content.
- Ignore audio quality – make sure your audio is clear and at an appropriate level.
Resources for Additional Support
If you're still looking for more resources to level up your YouTube video editing skills, consider checking out how to make YouTube videos for online courses and educational resources. Remember that it takes time and practice to become a skilled video editor, so don't hesitate to seek out additional resources and tutorials to sharpen your skills!
YouTube Video Editors An Overview
- Your Skill Level
- System Requirements
- Features and Functionality
- Budget
- Support and Updates
- Integration with Other Tools
- Desktop Video Editors
- Online Video Editors
- Mobile Video Editors


 Think Media
Factors to Consider when Choosing a Video Editor
When it comes to creating high-quality YouTube content, video editing plays a crucial role. Choosing the right video editor can significantly impact the final result of your videos. To help you make an informed decision, let's discuss the essential factors to consider when selecting a video editor for your content.
Your Skill Level
Your experience and skill level in video editing should be the first thing to consider when choosing a video editor. Some editing software may be more user-friendly and cater to beginners, while others might have a steep learning curve and are geared towards experienced editors.
Beginners may find software like iMovie or Adobe Premiere Elements suitable. For advanced editors, professional tools like Adobe Premiere Pro or Final Cut Pro could be a better fit.
System Requirements
The video editing software you choose should work seamlessly with your computer's hardware and operating system. Check your computer's specifications and the software requirements to ensure compatibility. High-performance computers can handle advanced video editing software without issues, while average or lower-end computers may work best with lightweight, simplified editing software.
Features and Functionality
Consider the specific features and functions you require in a video editor. Common features include:
- Cutting and merging video clips
- Color correction and grading
- Text overlay and title animations
- Visual effects and transitions
- Audio editing and mixing
- Chroma key (green screen) support
To fulfill various content needs, it is crucial to choose an editor that offers the features that align with your editing style and your videos' requirements.
Budget
Video editing software comes in different price ranges. Some tools, like Lightworks and DaVinci Resolve, are available for free. Others, like Adobe Premiere Pro, operate on a monthly subscription model, while programs like Final Cut Pro are a one-time purchase.
Consider your budget constraints and the features you require when selecting a video editor. Remember to weigh the software's cost against its usefulness and potential return on investment.
Support and Updates
Choose a video editor that provides reliable customer support and regular updates. Software that continually updates ensures compatibility with the latest video codecs and technologies. Check for resources like tutorials, forums, and customer support when evaluating your options.
Integration with Other Tools
Finally, consider how the video editor integrates with other tools you use in your creative workflow, such as graphic design, color grading, 3D modeling, and audio editing software. Seamless integration improves efficiency and streamlines your content creation process.
Types of Video Editors
Desktop Video Editors
Desktop video editors are software applications installed on your computer that provide a rich set of features and tools for video editing. They range from user-friendly editors for beginners to professional-grade software with powerful capabilities tailored for advanced users.
- Beginner-level: Windows Movie Maker, iMovie, and Lightworks.
- Intermediate-level: Adobe Premiere Elements, Filmora, and Camtasia.
- Advanced-level: Adobe Premiere Pro, Final Cut Pro X, and DaVinci Resolve.
Do's
- Choose an editor based on your expertise and the learning curve you're willing to endure.
- Ensure your computer meets the minimum specifications required by the software.
- Regularly save your project to avoid losing progress due to software crashes or power outages.
Don'ts
- Don't use cracked or pirated versions of the software. This can lead to legal issues, viruses, and a lack of software support.
Online Video Editors
Online video editors are cloud-based platforms that allow users to edit videos directly within their web browsers. These editors offer a simpler approach to video editing compared to desktop applications.] They are perfect for those who need basic editing tools without the hassle of managing and updating software on their computers.
Do's
- Use cloud storage to save your projects and media files for easy access and sharing.
- Regularly export edited videos to your computer or cloud storage to avoid losing progress.
Don'ts
- Don't rely solely on online video editors for complex or time-sensitive projects, as they may not offer all the advanced tools and features provided by desktop applications.
Mobile Video Editors
Mobile video editors are apps designed for smartphones and tablets, providing a portable solution for YouTube content creators on the go. While mobile video editors may not offer all the advanced features of desktop software, they provide enough flexibility and convenience for basic editing tasks.
- Adobe Premiere Rush (iOS, Android)
- KineMaster (iOS, Android)
- LumaFusion (iOS only)
Do's
- Use mobile video editors for quick edits and social media posts while on the move.
- Keep your media files organized using folders and cloud storage for easy access and backup.
Don'ts
- Don't rely solely on mobile video editors for large-scale editing projects or high-quality video production.
Looking for Brand Deals or Channel Strategy?
We run a platform for brand deals and an agency, helping creators derive maximum value from their content, while offering brands access to unparalleled, best-in-class research.
For Creators
- Strategic Brand Connections
- Outreach to Old Sponsors
- Platform to Manage Brand Deals
- View-Based Contract Negotiation
- Comprehensive Channel Strategy
- Channel/Thumbnail Optimization
For Brands
- Tools to Shortlist Creators
- Targeted Creator Outreach
- Detailed Sponsorship Reports on Existing Brands
- Platform to Manage Creator Deals
- View-Based Deal Facilitation
Apply to work with us or email [email protected]
 Film Booth
 Fresh Creative Media
 Howfinity
 Justin Brown - Primal Video
 Aprilynne Alter
 Think Media
Table of Contents
Work with us