 Ronald Aug . March 20
Choosing The Right Equipment
Audio Equipment for YouTube
- Microphones for different purposes
- Audio interfaces and mixers
- Accessories for better sound quality
- Types of Microphones
- Microphone Features
- Popular Microphone Models
- Recommended microphones for various budgets

 Ben Johnson
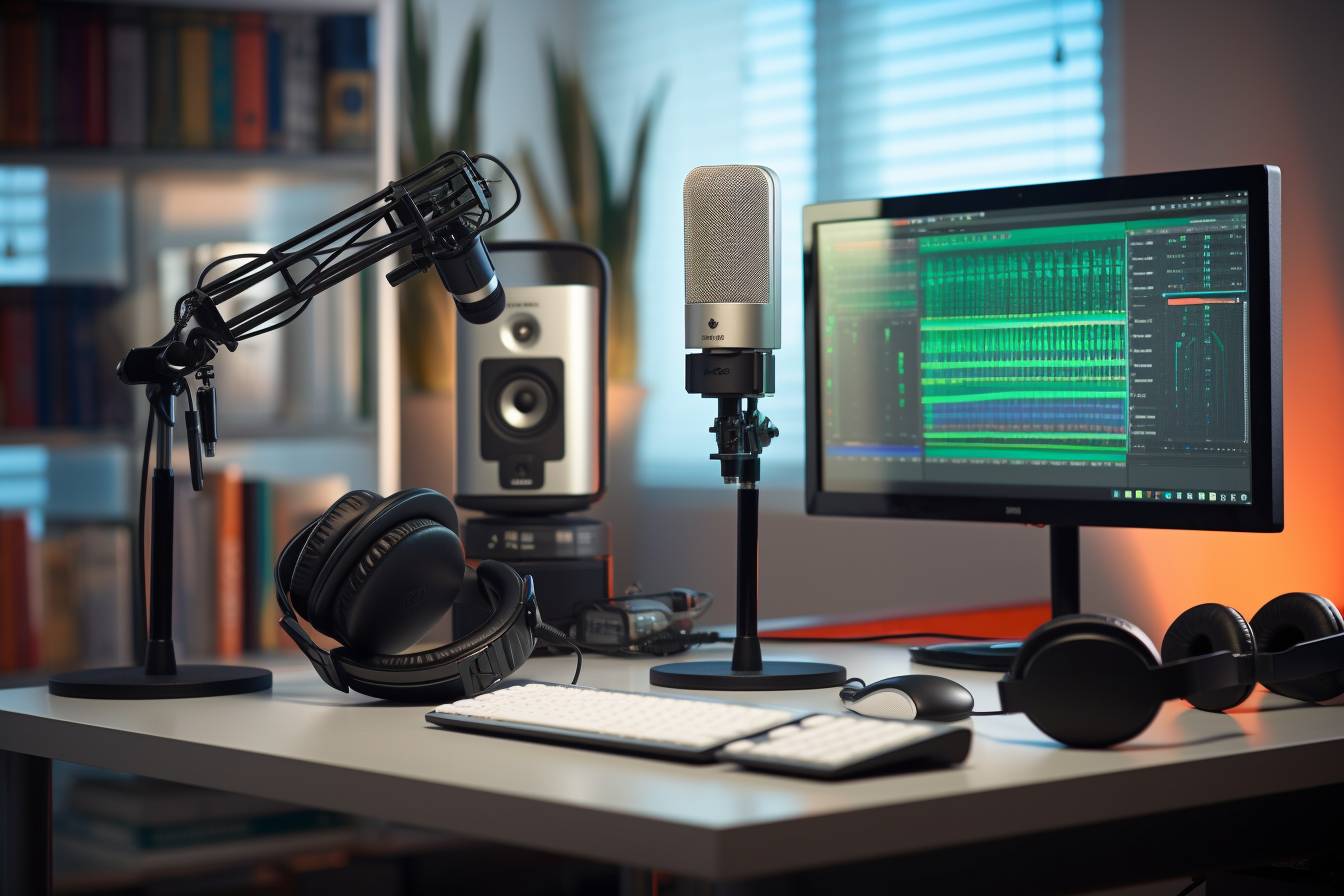
Audio Equipment for YouTube
Audio accessories for improved sound quality
In the world of YouTube content creation, having good audio quality is essential for engaging and retaining your audience. The right audio equipment can greatly improve the quality of your videos and provide a more enjoyable viewing experience for your audience. In this section, we will discuss various audio accessories that can help enhance the sound quality of your YouTube videos.
Microphones for different purposes
There are different types of microphones available, depending on your recording needs. Here is a list of commonly used microphones for YouTube content.
-
Lavalier microphones - These small, clip-on microphones are great for interviews, vlogging, or presentations. They can be wired or wireless, depending on your preference.
-
Shotgun microphones - These directional microphones are excellent for capturing clear audio from a specific source while minimizing background noise. They can be mounted on your camera or a separate boom pole.
-
Condenser microphones - Ideal for voiceovers, podcasts, or recording music, these microphones are sensitive and can capture high-quality audio.
-
Dynamic microphones - These microphones are versatile and suitable for a range of uses, such as recording vocals, instruments, or podcasts.
Audio interfaces and mixers
An audio interface is a device that connects your microphone to your computer, allowing you to capture high-quality audio. Some microphones, such as USB microphones, don't require an audio interface as they can be plugged directly into your computer. However, for better control over your audio levels and quality, it's recommended to use an audio interface or mixer.
-
Audio interfaces - These devices convert your microphone's analog signal into a digital signal, which can be recorded on your computer. They usually have various inputs, allowing you to connect multiple microphones or instruments.
-
Mixers - These devices allow you to adjust the balance, volume, and EQ of your audio sources. You can use a mixer to blend different audio sources together and create a polished final product.
Accessories for better sound quality
In addition to microphones and audio interfaces, there are other accessories that can help improve your audio quality for YouTube videos.
-
Pop filters or wind screens - These accessories help reduce plosive sounds ("p" and "b" sounds) and wind noise that can cause distortion in your recordings.
-
Shock mounts - A shock mount isolates your microphone from vibrations and handling noise, ensuring cleaner and more stable audio recordings.
-
Boom poles and stands - Using a boom pole or microphone stand can help you position your microphone optimally, reducing unwanted noise and reflections.
-
Acoustic treatment - To reduce echo and reverb in your recording space, consider using acoustic foam, bass traps, or other sound-absorbing materials.
Do
- Use the right microphone for your recording needs
- Consider using an audio interface or mixer for better control over your audio levels and quality
- Invest in accessories that can help improve your sound quality, such as pop filters, shock mounts, and acoustic treatment
Don't
- Rely solely on your camera's built-in microphone, which can result in poor audio quality
- Forget to monitor your audio levels while recording
- Neglect the importance of a quiet and echo-free recording environment
Audio Equipment for YouTube
Comparing Microphone Features
Selecting the right microphone is essential for producing high-quality audio for your YouTube videos. In this section, we'll discuss the different types of microphones, their features, and how to choose the best one for your needs.
Types of Microphones
There are three main types of microphones used for YouTube content creation: condenser, dynamic, and lavalier microphones. Each has its advantages and disadvantages, based on the recording environment and purpose.
Condenser Microphones
Condenser microphones offer excellent sound quality and sensitivity, making them ideal for recording vocals, instruments, and podcasts. They require external power or batteries for the on-board electronics, known as a power supply.
Dynamic Microphones
Dynamic microphones are rugged, versatile, and require no external power, making them useful for a wide range of situations. They're ideal for live performances, interviews, and noisy environments.
Lavalier Microphones
Lavalier microphones are small, clip-on mics that attach to clothing for hands-free recording. They're perfect for interviews, presentations, or videos with a single speaker.
Microphone Features
When comparing microphones, consider the following features to determine the best option for your needs:
-
Audio Quality: Choose a microphone with a wide frequency response for excellent audio quality. Lower-end microphones may have narrower frequency responses and reduced audio clarity.
-
Polar Pattern: Microphones have different polar patterns, which indicate the directionality of the mic's sensitivity. Common polar patterns include cardioid (front-facing), omnidirectional (all sides), and bidirectional (front and rear-facing). Select a pattern based on your recording requirements. Cardioid is generally the preferred option for YouTube videos.
-
Connectivity: Look for microphones with USB or XLR connections, depending on your audio recording setup. USB microphones are plug-and-play, while XLR microphones generally offer better audio quality but require additional equipment, such as an audio interface.
-
Portability: If you plan on recording videos while traveling or on-location, choose a lightweight and portable microphone.
-
Price: Budget is always a consideration. Determine your price range and evaluate the best microphones within that budget for your needs.
Popular Microphone Models
Here are some popular microphone models used by YouTube creators:
- Audio-Technica AT2020 (Condenser)
- Rode NT1-A (Condenser)
- Shure SM7B (Dynamic)
- Rode VideoMic Pro (Shotgun)
- Rode SmartLav+ (Lavalier)
Do:
- Test different microphones before making a purchase.
- Choose a microphone with the right polar pattern for your recording needs.
- Invest in a good-quality microphone for better audio quality.
Don't:
- Assume the most expensive microphone is the best choice for your needs.
- Neglect to learn how to use your microphone properly for optimal sound quality.
- Overlook the importance of good audio equipment for your YouTube videos.
To further improve your YouTube content, consider taking an online course on how to make YouTube videos to learn about various aspects of video production, including audio equipment.
Overall, choosing the right microphone is crucial for creating top-quality content for your YouTube channel. Consider your specific needs, recording environment, and budget to make the best decision.
Audio Equipment for YouTube
Recommended microphones for various budgets
Good audio quality is essential for producing engaging and professional YouTube content. One of the key factors in achieving excellent audio is having the right microphone. In this section, we will explore recommended microphones for various budgets, ensuring you can find the best audio equipment regardless of your financial constraints.
According to a survey conducted by Social Media Examiner, approximately 60% of content creators reported that the quality of their audio equipment was important. This indicates the significant role that audio quality plays in the production of YouTube videos.
Different Types of Microphones for YouTube
- USB Microphones
- XLR Microphones
- Lavalier Microphones (Lapel)
- Shotgun Microphones
- Condenser Microphones
- Dynamic Microphones
Top Microphone Recommendations for Various Budgets
Here is a list of highly recommended microphones for different budgets:
Budget (under $50)
- Audio-Technica ATR2100x-USB
- Samson Go Mic
- Neewer NW-700
Mid-Range ($50 - $150)
- Blue Yeti USB Microphone
- Rode VideoMic
- Shure SM58
- Audio-Technica AT2020
High-End (over $150)
-
Rode NTG4+ Shotgun Microphone
-
Sennheiser MKH 416
-
Shure SM7B
-
Do: Research and compare different types of microphones to find the best fit for your needs and budget
-
Do: Test and adjust your microphone settings before recording
-
Do: Invest in a quality microphone if possible, as better audio quality can enhance viewer retention
-
Don't: Rely solely on your camera's built-in microphone
-
Don't: Overlook the importance of good audio quality in your videos
-
Don't: Forget to consider the compatibility of your microphone with your recording device
Additional Resources for YouTube Equipment
For more information about how to create high-quality YouTube content, check out this comprehensive guide on How to make YouTube Videos.
Investing in a good quality microphone is crucial for producing professional and engaging YouTube content. Understanding the different types and price ranges of microphones available is essential for choosing the right audio equipment for your YouTube channel. With this guide, you can confidently make the best choice for your budget and content creation goals.
Audio Equipment for YouTube
Types of Microphones
Overview
- 500 hours of content are uploaded to YouTube every minute.
- 81% of 15-25 year-olds in the U.S. use YouTube.
These stats highlight the vast potential audience for YouTube content and the importance of high-quality audio equipment to stand out in a competitive market.
Microphone Types
-
Dynamic Microphones
Pros: Durable, Great at handling high volumes, Low self-noise
Cons: Limited frequency response
-
Condenser Microphones
Pros: High sensitivity, Wide frequency response, Excellent for studio recording
Cons: Requires external power source (phantom power), Fragile
-
Shotgun Microphones
Pros: Highly directional, Effective at isolating the target sound
Cons: Requires precise positioning, Susceptible to wind noise
-
Lavalier Microphones
Pros: Easy to conceal, Hands-free, Omnidirectional pickup pattern
Cons: Not effective in noisy environments, Limited frequency response
- Do invest in a good quality microphone suitable for your specific use.
- Do use proper microphone techniques to optimize audio capture.
- Do pay attention to your recording environment and consider using soundproofing if needed.
- Don't rely on your camera or smartphone's built-in microphone for professional-sounding audio.
- Don't position the microphone too close or too far away from the sound source.
- Don't forget to use appropriate accessories like wind protectors or shock mounts when needed.
Choosing the Best Microphone
Before purchasing a microphone, consider the following factors:
- Recording Environment: Identify the typical setting for your recordings and select a microphone that performs well in that environment.
- Budget: Determine your budget, keeping in mind that it's often better to invest in a good microphone initially, rather than upgrading later.
- Compatibility: Check the microphone's compatibility with your existing equipment (e.g., cameras, audio interfaces, recorders).
- Purpose: Determine the primary purpose of the microphone (e.g., voiceovers, interviews, music performances) and choose accordingly.
For a comprehensive guide on how to make YouTube videos, including selecting the right equipment, visit how to make youtube videos.
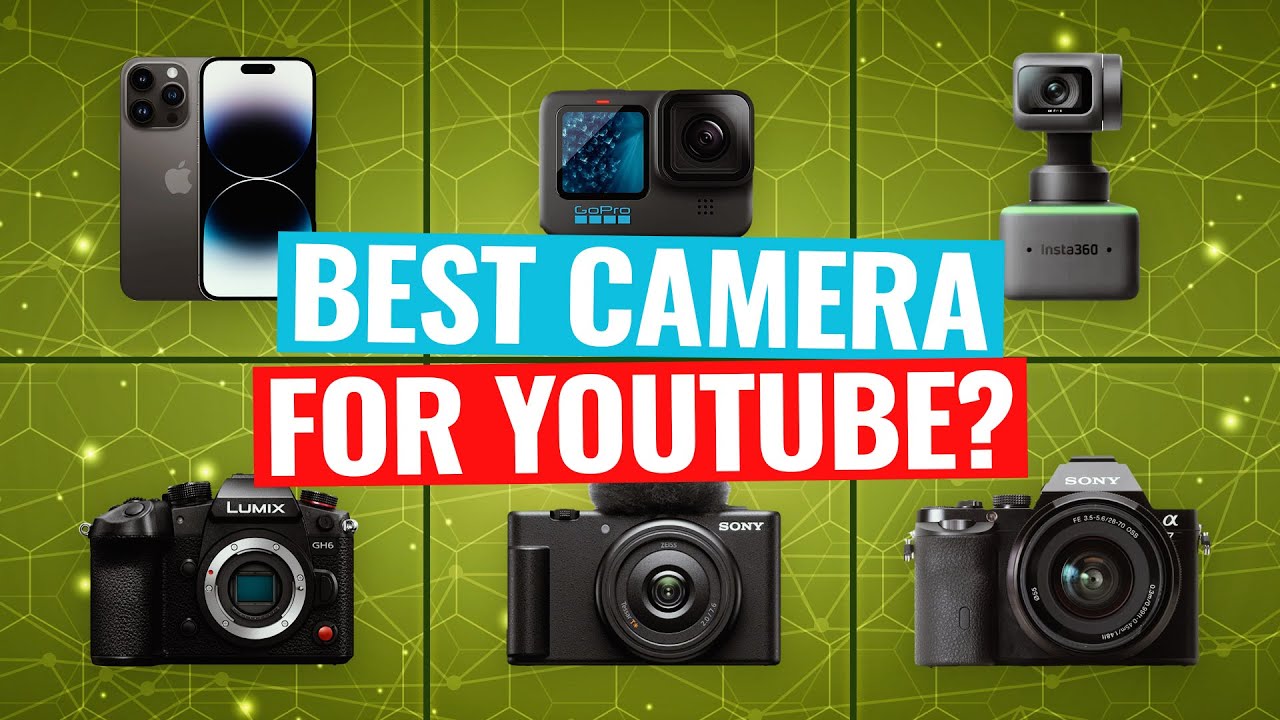
Choosing the Right Camera for YouTube

 Justin Brown - Primal Video
Choosing the Right Camera for YouTube
Comparing Camera Features
When selecting the right camera for your YouTube channel, it's essential to compare various camera features to ensure you're investing in the best equipment for your needs. To help you make an informed decision, we have collected key aspects to consider, including stats, images, tables, and lists.
Camera Sensor Size
A camera's sensor size determines the image quality and depth of field (the range of distance that appears sharp in an image). Larger sensors generally capture more detail and perform better in low light situations. Here's a comparison of three common sensor sizes:
- Full Frame (36x24mm): Great for professional filmmaking and photography
- APS-C (23x15mm): A more budget-friendly option, common in DSLRs and mirrorless cameras
- 4/3" (17x13mm): Typically found in compact cameras, offers good quality for most YouTubers
Resolution
Resolution is another essential factor to consider when comparing cameras. Most YouTube content is consumed in 1080p, so this should be the minimum resolution for your camera. However, 4K resolution is becoming increasingly popular and allows for more editing flexibility. Here are some commonly used resolutions:
- 720p: Entry-level resolution
- 1080p: Standard HD resolution
- 4K (3840x2160): Ultra HD resolution, four times the detail of 1080p
- 8K (7680x4320): Currently rare on YouTube, but future-proof for increased detail
Frame Rate
The frame rate (measured in frames per second) determines how smoothly the video plays. A higher frame rate is suitable for filming fast-paced segments or producing slow-motion effects in post-production. Common frame rates include:
- 24 fps: Standard for narrative and storytelling content
- 30 fps: Common frame rate for YouTube general content
- 60 fps: Suitable for gaming, sports, or action videos
- 120 fps and higher: Ideal for slow-motion playback
Autofocus & Stabilization
A camera with fast autofocus ensures that your footage remains sharp and in focus, especially when filming on-the-go or capturing fast-moving subjects. Consider cameras with face and eye detection for optimal focus when filming people. Additionally, in-body stabilization or lens-based stabilization can help reduce camera shake and create smoother videos.
Audio
While image quality is crucial, sound quality should not be neglected. Built-in microphones on most cameras don't provide the best audio, so consider cameras that have external microphone inputs, like a 3.5mm audio jack or an XLR input for professional microphones. This feature will enable you to capture clear sound and improve the overall quality of your videos.
Connectivity Options
Having connectivity options like Wi-Fi and Bluetooth can make your life much more manageable. For instance, Wi-Fi and Bluetooth capabilities enable you to transfer videos to your smartphone or laptop without relying on cables or memory cards. This can significantly speed up your workflow and ensure you're able to upload your videos quickly.
Budget
Finding a camera that fits your budget is crucial. Don't be afraid to explore different options, as many budget-friendly cameras provide excellent features for YouTubers. Compare cameras in your price range, and keep an eye out for deals or discounts.
Here's a comparison table to help you visualize the differences between popular cameras for YouTube:
| Camera Model | Sensor Size | Resolution | Frame Rate | Autofocus & Stabilization | Audio Input | Connectivity | Price Range |
|---|---|---|---|---|---|---|---|
| Canon EOS M50 | APS-C | 4K | 24/30 fps | Dual Pixel AF, IBIS | 3.5mm Jack | Wi-Fi, Bluetooth | $$ |
| Sony A7 III | Full Frame | 4K | 24/30 fps | Fast Hybrid AF, IBSCII | 3.5mm Jack | Wi-Fi, Bluetooth, USB-C | $$$$ |
| Panasonic GH5 | 4/3" | 4K | 60 fps | Advanced DFD AF, IBIS | 3.5mm Jack | Wi-Fi, Bluetooth, USB-C | $$$$ |
Finally, to learn more about making YouTube videos, you can explore various resources such as online courses and educational resources. These courses may offer additional information or tips on how to choose the right camera and other equipment to create high-quality YouTube content.
Choosing the Right Camera for YouTube
Mobile phone cameras vs dedicated cameras
Today, the quality of mobile phone cameras has improved immensely, leading to the debate of whether one should use a mobile phone camera or a dedicated camera for YouTube content creation. Here, we will compare the two camera types to help you make the best decision for your YouTube channel.
Image Quality and Resolution
Mobile phone cameras offer the convenience of portability and user-friendliness. The latest smartphones like the iPhone 12 Pro and Samsung Galaxy S21 Ultra offer up to 4K video recording at 60 fps, which could match some dedicated cameras. However, dedicated cameras, especially DSLRs and mirrorless cameras, still provide better overall image quality, a larger sensor size, and the ability to interchange lenses, which ultimately give users more creative control.
Low Light Performance
Dedicated cameras have a clear edge in low light situations. Large sensors in DSLRs and mirrorless cameras provide better low light performance than mobile phone cameras, making them more suitable for indoor events, night photography, or natural light shooting.
Image Stabilization
While most modern smartphones offer some form of image stabilization, dedicated cameras with built-in image stabilization or lenses that feature optical image stabilization perform significantly better. This results in smoother, less shaky footage.
Audio Quality
While mobile phones have decent microphones, they cannot match the audio quality of external microphones or audio recorders that can be used with dedicated cameras. Clear and high-quality audio can significantly impact viewer satisfaction and watch time.
Versatility
Dedicated cameras offer greater versatility due to their interchangeable lenses and numerous settings, which allows creators to experiment and find the perfect settings for each situation. Mobile phone cameras, on the other hand, usually limit users to a few preset modes.
Price
Smartphones can be more budget-friendly compared to a DSLR or mirrorless camera, especially if you already own one with a high-quality camera. However, dedicated cameras can range widely in price, and there are affordable options available as well for those just starting in content creation.
Do's and Don'ts
- Do invest in a dedicated camera if you have a specialization like filmmaking, action sports, travel vlogs, or photography tutorials, as the flexibility and quality will enhance your content.
- Don't shy away from using your mobile phone camera if you are a beginner, or if it suits your content style and budget constraints.
- Do invest in additional accessories like tripods, gimbals, and external microphones to improve the quality of your mobile phone footage if you decide to use your smartphone for video creation.
Choosing the Right Camera for YouTube
Recommended Cameras for Various Budgets
When choosing the right camera for your YouTube channel, keep in mind that there's an option for every budget. In this section, we will discuss some highly recommended cameras for various budgets, ranging from entry-level to professional.
Entry-Level Cameras
For those starting on YouTube who don't want to spend much, these are some of the best budget-friendly cameras available:
- Canon Powershot SX740 HS - A compact digital camera with 4K video capabilities and 20.3-megapixel sensor.
- GoPro HERO7 Silver - An action camera with 4K video, waterproof capabilities, and voice command.
- Panasonic Lumix ZS70 - A travel zoom camera with 4K video, 20.3-megapixel sensor, and touch-screen.
Mid-Range Cameras
If you're ready to invest a bit more for better video quality, consider these mid-range options:
- Canon EOS M50 - A mirrorless camera with 4K video, 24.1-megapixel sensor, and interchangeable lenses.
- Sony A6400 - A mirrorless camera with 4K video, 24.2-megapixel sensor, and fast autofocus.
- Panasonic Lumix G85 - A mirrorless camera with 4K video, 16-megapixel sensor, and weather sealing.
High-End Cameras
For professional YouTubers or those wanting top-notch video quality, these high-end cameras are worth the investment:
- Sony A7 III - A full-frame mirrorless camera with 4K video, 24.2-megapixel sensor, and advanced autofocus system.
- Canon EOS R - A full-frame mirrorless camera with 4K video, 30.3-megapixel sensor, and impressive low-light performance.
- Panasonic Lumix GH5 - A mirrorless camera with 4K video, 20.3-megapixel sensor, and high frame rate capabilities.
Do's:
- Choose a camera suited for your needs and budget.
- Consider factors like video resolution, sensor size, and autofocus performance.
Don'ts:
- Overspend on a camera with features you may not use.
- Prioritize brand over camera specifications and features.
For additional resources on making YouTube videos, check out our guide on how to create content for YouTube.
Choosing the Right Camera for YouTube
When it comes to creating YouTube videos, one of the essential factors for success is choosing the right camera. This section aims to provide you with essential information on different camera types to help you find the ideal camera for your content. We'll cover the pros and cons of each camera type and offer insights into their suitability for various content styles.
Table of Contents
- Compact Cameras
- DSLRs and Mirrorless Cameras
- Camcorders
- Action Cameras
- Smartphones
- Webcams
Compact Cameras
Pros
- Small and lightweight
- Easy to use
- Built-in lens
Cons
- Limited lens options
- Limited control over settings
Compact cameras, also known as point-and-shoot cameras, are an excellent choice for beginners or casual content creators. They're small, lightweight, and easy to use, making them an ideal option for on-the-go shooting or vlogging.
DSLRs and Mirrorless Cameras
Pros
- Interchangeable lenses
- Excellent image quality
- Manual controls
Cons
- Can be expensive
- Steeper learning curve
DSLR and mirrorless cameras offer more advanced features for those looking to take their content to the next level. With interchangeable lenses and manual controls, you'll have the flexibility to create various video styles.
Camcorders
Pros
- Designed for video recording
- Good battery life
- Optical zoom
Cons
- Less versatile than DSLRs and mirrorless cameras
- Can struggle in low-light conditions
Camcorders are a conventional choice for video recording, offering features such as good battery life and optical zoom. However, they can be less versatile in comparison to DSLRs and mirrorless cameras.
Action Cameras
Pros
- Durable and waterproof
- Ultra-wide-angle lenses
- Compact and lightweight
Cons
- Limited controls and settings
- Lower image quality compared to DSLRs and mirrorless cameras
Action cameras are designed for capturing action-packed footage and are ideal for travel vloggers, adventure enthusiasts, or sports content. They're durable, waterproof, and feature ultra-wide-angle lenses.
Smartphones
Pros
- Convenient and always available
- Decent image quality
- Integrated editing and sharing features
Cons
- Limited lens options
- Can struggle in low-light conditions
- Audio quality can be subpar
Smartphones have significantly improved their camera capabilities in recent years, making them a viable option for casual content creators.
Webcams
Pros
- Affordable
- Perfect for streaming and video calls
Cons
- Limited image quality
- Less versatile than other camera types
Webcams are suitable for creators who primarily focus on streaming or video calls, such as gamers or online tutors.
- Vlogging: Compact cameras or smartphones
- Cinematic videos: DSLRs and mirrorless cameras
- Action and sports: Action cameras
- Streaming and video calls: Webcams
Finally, if you want to learn more about how to make YouTube videos, we recommend checking out the variety of online courses and educational resources available.
Lighting for YouTube Videos
- Comparing Lighting Equipment
- Recommended Lighting Kits for Various Budgets
- Tips for optimizing natural light
- Types of lighting setups

 Lila
Lila
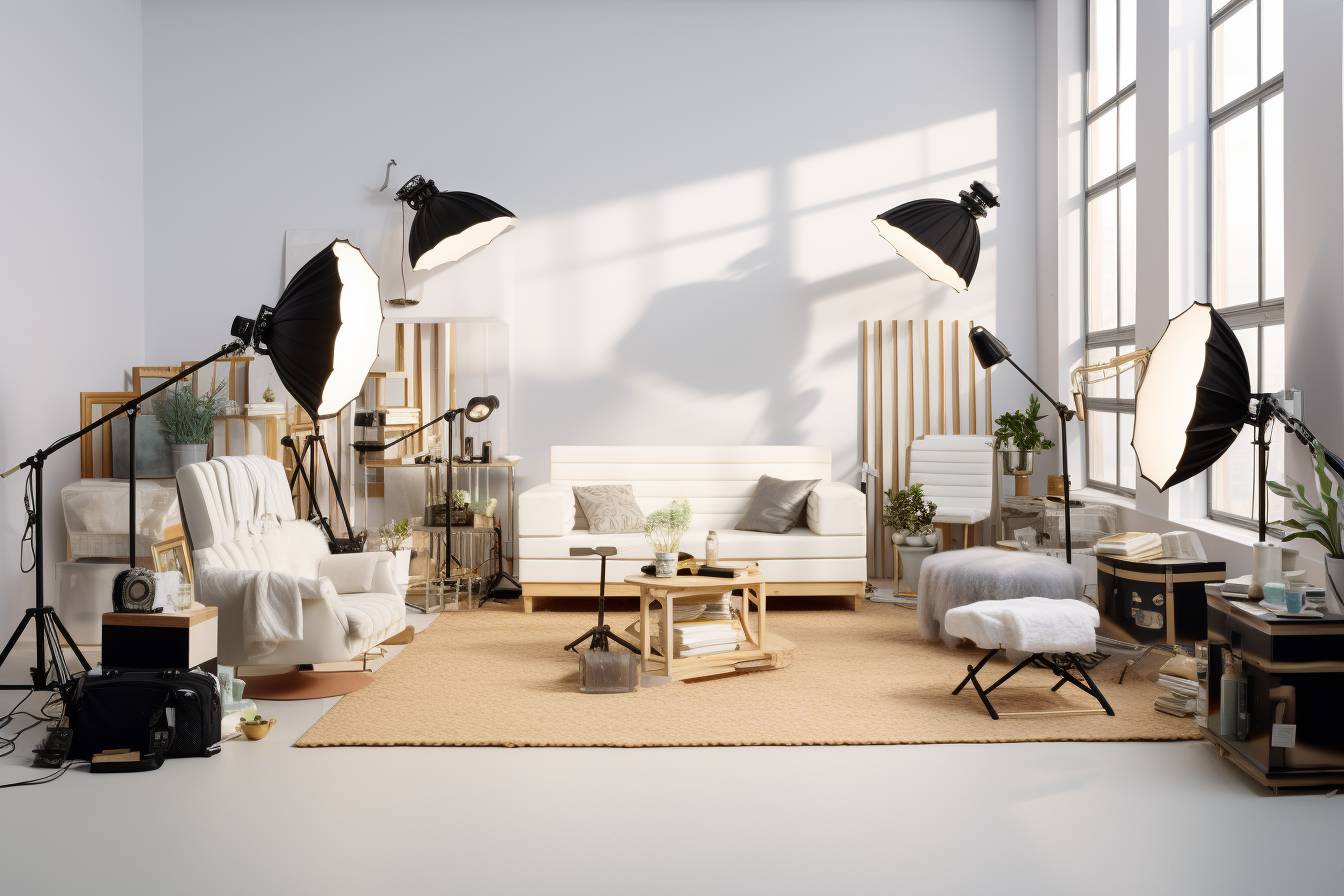
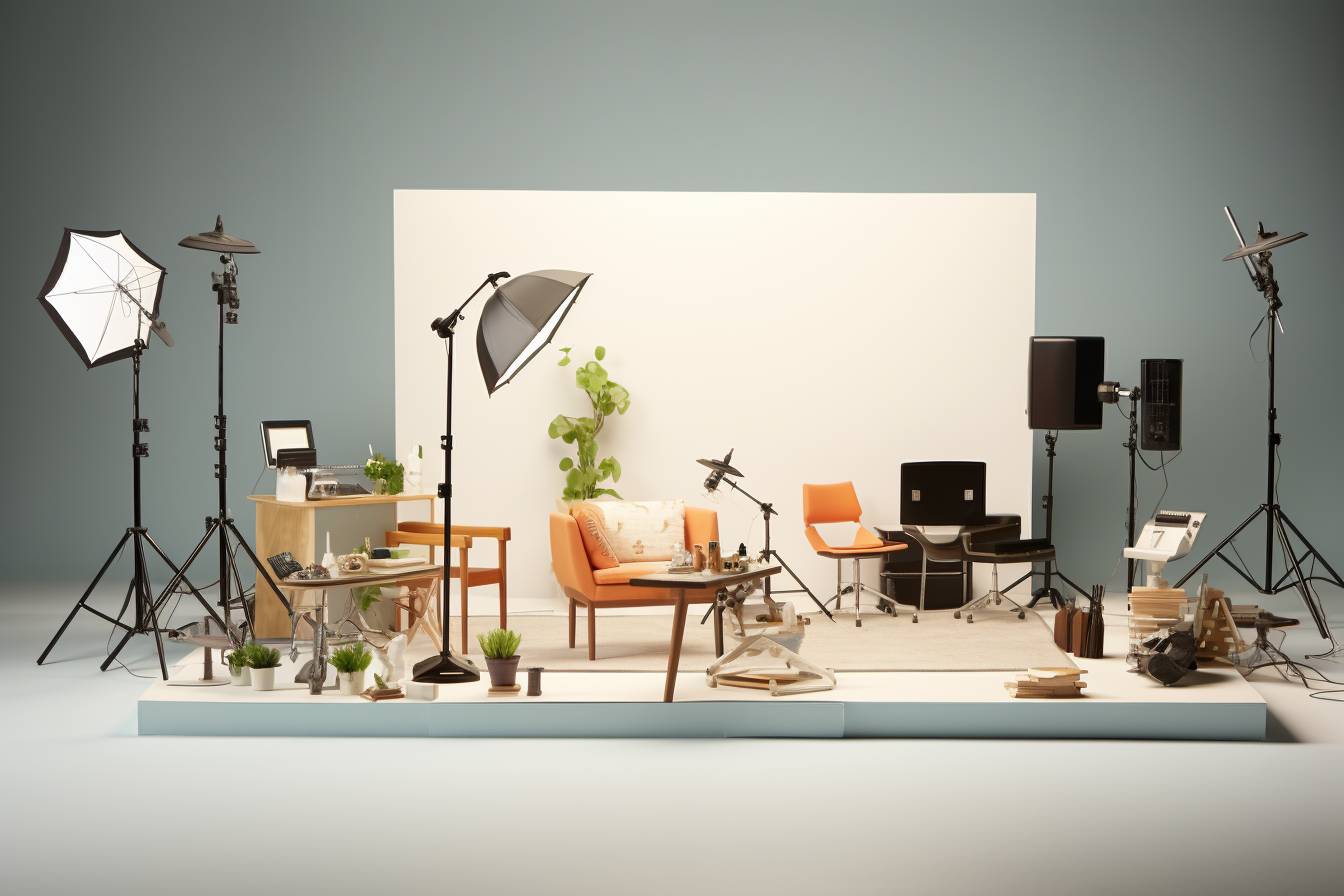
Lighting for YouTube Videos
Comparing Lighting Equipment
Lighting plays an essential role in creating high-quality YouTube content. The correct lighting setup can improve the overall aesthetic, mood, and visual quality of your videos. This section will explore various lighting equipment, provide comparisons, and offer tips and best practices to help you make an informed decision when choosing the right lighting for your YouTube videos.
Types of Lighting Equipment
There are several types of lighting equipment available in the market. Some common types include:
- Ring Lights: Circular lights designed to produce an even and diffused light that can help eliminate shadows and create flattering lighting for faces. Ring lights are especially popular among beauty and makeup YouTubers.
- Softboxes: Softboxes are used to diffuse light and create a soft, even illumination that minimizes harsh shadows. They are commonly used in product photography and portrait photography but are also suitable for YouTube videos.
- LED Panels: LED panels are energy-efficient and versatile lighting options that produce a consistent and adjustable light source that can be shaped and directed. They are suitable for various video production purposes, including YouTube content creation.
- Umbrella Lights: Umbrella lights are a type of diffuser that can soften and spread light across a broader area. They are easy to set up and are an affordable option for beginner YouTubers.
Comparing Lighting Equipment
-
Ring Light: A popular choice for YouTubers who create beauty, fashion, and makeup tutorials. The circular shape of the light creates a flattering illumination on the face and reduces harsh shadows.
- Pros: Even, flattering light; reduces shadows; emphasizes facial features
- Cons: Limited in versatility; mainly suitable for one lighting setup
-
Softbox Kit: A versatile lighting choice suitable for various video styles, including product reviews, talking head videos, and interviews. Softboxes can create a diffuse, even light for a professional look.
- Pros: Soft, even light; versatile; professional appearance
- Cons: Can be bulky; takes time to set up and disassemble
-
LED Panel Kit: Great for filmmakers and YouTubers who require adjustable and customizable lighting, LED panels provide flexibility in terms of brightness and color temperature control.
- Pros: Energy-efficient; adjustable brightness and color temperature; portable and lightweight
- Cons: Can be expensive; may require additional accessories to diffuse light
-
Umbrella Light Kit: A budget-friendly option for beginners who require an easy-to-use lighting setup. Umbrella lights diffuse light through the umbrella, creating a broader and softer overall illumination.
- Pros: Affordable; easy to set up; soft, diffused light
- Cons: Not as versatile as other options; less control over light direction
Do's:
- Use natural light whenever possible, but be mindful of changing lighting conditions throughout the day.
- Experiment with different lighting setups to find the best option for your content and filming environment.
- Diffuse light to reduce harsh shadows and create an even, professional appearance.
- Invest in quality equipment that will last and provide consistent results.
Don'ts:
- Rely solely on overhead or built-in room lighting, as it can create unflattering and uneven lighting conditions.
- Over-saturate your scene with too much light, which can wash out colors and details.
- Ignore the importance of light placement and angles when setting up your lighting equipment.
- Skimp on investing in good-quality lighting equipment, as lighting is a crucial aspect of creating professional and visually appealing videos.
Understanding the different types of lighting equipment and their advantages and disadvantages is crucial for creating professional and visually appealing YouTube videos. Consider your content, budget, and filming environment when choosing the right lighting setup, and be prepared to experiment and find the best lighting solution for your needs. To learn more about creating high-quality YouTube videos, check out how to make YouTube videos.
Lighting for YouTube Videos
Recommended Lighting Kits for Various Budgets
The Importance of Proper Lighting
- Statistics: Videos with proper lighting have been shown to garner up to 93% higher engagement rates than videos with poor lighting.
- Chart: The following chart demonstrates the correlation between good lighting and viewer engagement rates.
Lighting Kits for Different Budgets
The following is a list of recommended lighting kits for different budget levels.
-
Low Budget: Neewer 2-Pack Dimmable LED Video Light
- Price: $50 - $100
- Key Features: Dimmable, lightweight, and portable
-
Mid Budget: LimoStudio Softbox Lighting Kit
- Price: $100 - $200
- Key Features: Softbox diffusers, adjustable light stands, and energy-efficient bulbs
-
High Budget: Aputure AL-MC RGBWW LED Video Light
- Price: $200 - $500
- Key Features: RGBWW color mixing, Wireless charging, CCT range of 3200K-6500K
-
Do's:
- Use diffusers to soften harsh light.
- Utilize three-point lighting setups for balanced and professional-looking results.
- Learn how to make YouTube videos with proper lighting techniques.
-
Don'ts:
- Rely solely on natural light, as it can change throughout a video shoot.
- Place your subject too close or too far from the light source, as doing so can result in unflattering shadows or overexposure.
Investing in the right lighting equipment can substantially enhance the quality of your YouTube videos. Regardless of your budget, there are lighting kits available that cater to your specific needs. By understanding the importance of proper lighting and applying the do's and don'ts outlined in this section, you can increase viewer engagement and grow your YouTube channel.
Lighting for YouTube Videos
Tips for optimizing natural light
Natural light can be a highly effective and cost-efficient lighting option for YouTube videos if it's harnessed correctly. The following tips explain how to optimize natural light for the best possible video quality.
Use indirect sunlight
Indirect sunlight can provide a soft and flattering light source for your videos. To make the most of indirect sunlight, position your set-up near a window that does not receive direct sunlight. Or, you can use a diffusion material such as a sheer curtain to soften the light coming through the window.
Shoot during the golden hour
The golden hour – the period shortly after sunrise or before sunset – is a favorite among filmmakers and photographers due to its soft, warm, and diffused lighting. If possible, time your video shoots during the golden hour to make the most of this natural light source. Check local sunrise and sunset times to determine the golden hour in your area.
Use reflectors and diffusers
Reflectors and diffusers can help you control and enhance the natural light in your video setup. Using a reflector can help you bounce light onto your subject from different angles, while diffusers soften and spread light evenly across the scene. Both tools are relatively inexpensive and can greatly improve the quality of your natural light setup.
Adjust your camera settings
Your camera settings play a vital role in capturing the best possible shots in natural light. Tweak the ISO, shutter speed, and aperture settings on your camera to find the perfect balance between exposure and depth for your videos. To gain an in-depth understanding of camera settings, check out this guide on how to make YouTube videos.
Monitor your lighting conditions
Natural lighting conditions can change rapidly, especially if you are shooting outdoors. Be prepared to adjust your camera settings and position to remain consistent with your desired lighting effect. Keep an eye on the sky and weather conditions to anticipate any potential changes during your shoot.
Don't mix natural light with artificial light
While some creators might be tempted to mix natural and artificial light, it's generally best to stick with one or the other to ensure a consistent and professional look. Mixing light sources can result in color balance issues and uneven light distribution across your scene.
Lighting for YouTube Videos
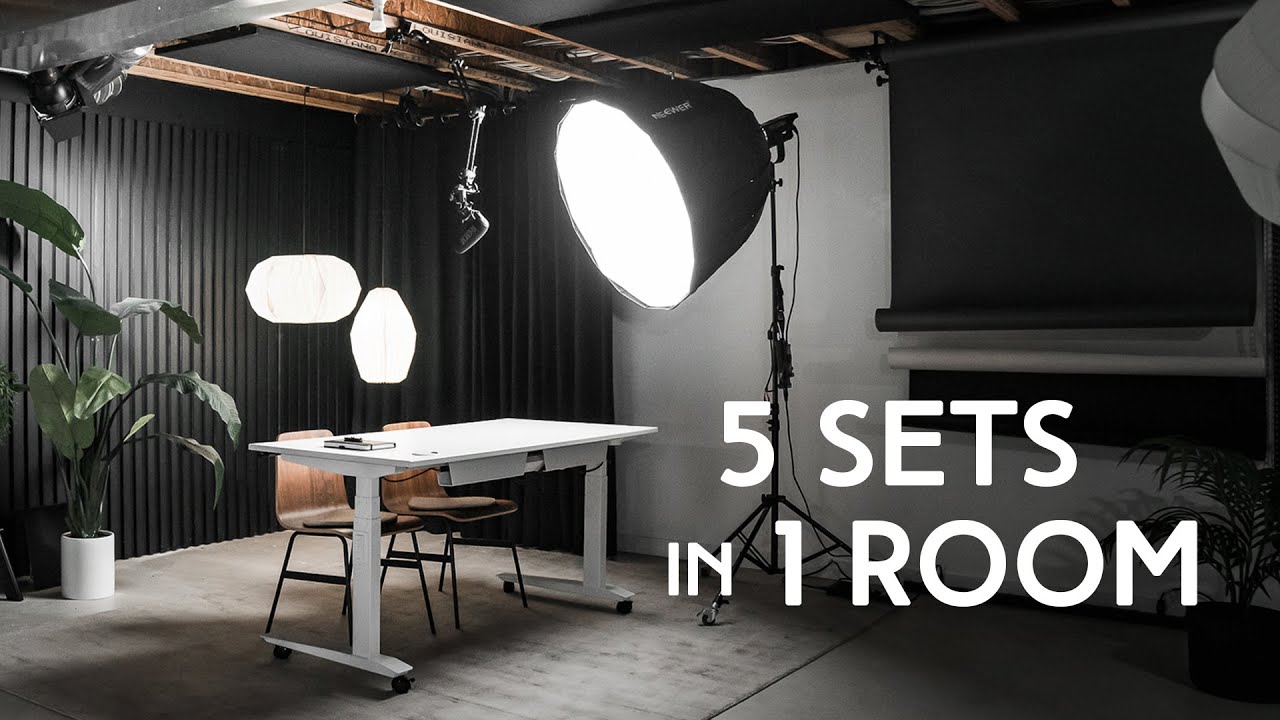
Types of lighting setups
Great lighting is essential for creating high-quality YouTube videos. Using the right lighting can make your videos look professional, make you appear more flattering, and enhance the overall production value of your content. There are several types of lighting setups that can be used for YouTube videos, and in this section, we'll cover the most common and effective options.
Three-Point Lighting
One popular and professional lighting setup is known as three-point lighting. As the name suggests, this setup uses three light sources placed around the subject:
-
Key Light: This is the main light source, typically placed at a 45-degree angle from the camera and the subject.
-
Fill Light: This light is used to fill in any shadows created by the key light, placed on the opposite side of the key light at a lower intensity.
-
Back Light: Positioned behind the subject, the back light helps separate the subject from the background by creating a rim of light around them.
This setup is commonly used in professional video production because it provides even lighting that highlights the subject and creates depth in your shot. However, it does require additional equipment and can be time-consuming to set up.
Natural Lighting
Natural lighting is an excellent option for YouTubers who don't want to invest in lighting equipment or who prefer to shoot outdoors. By using sunlight as your light source, you can create beautiful, flattering lighting for your videos.
However, there are some considerations when using natural lighting:
-
Time of day is crucial, as the position and intensity of the sun will affect your lighting. The "golden hour" (shortly after sunrise or before sunset) provides ideal lighting conditions.
-
Shooting on overcast days can result in even, diffused lighting without harsh shadows.
-
Using a reflector can help bounce sunlight onto your subject and fill in any shadows.
-
Don't rely on auto-exposure settings; manual adjustments can help you achieve the best look.
Ring Lights
Ring lights are a popular lighting choice for YouTubers, especially for beauty and makeup content. These lights provide an even, soft light that flatters the subject and minimizes shadows. Ring lights also create a distinctive "catchlight" in the subject's eyes, which can be a desirable effect. They're an affordable option and are easy to set up.
Softboxes
Softboxes are lighting modifiers that attach to artificial light sources, such as fluorescent or LED lights. They help diffuse, soften, and spread light, resulting in flattering, even illumination. Softboxes can be used in various setups, including traditional three-point lighting or with just a single light source.
-
DO consider your shooting environment, as certain lighting choices may work better in specific locations or conditions.
-
DON'T rely solely on your camera's built-in flash, as this usually results in harsh, unflattering lighting.
-
DON'T forget about color temperature - different light sources produce different color temperatures, which can affect the overall look of your video. If using multiple light sources, try to maintain consistent color temperatures.
When learning how to make YouTube videos, mastering the art of lighting can make a significant impact on the quality of your content and help elevate your channel to new heights. By understanding the different types of lighting setups and techniques, you can create visually stunning and professional-looking videos that set you apart from the competition.
Set and Background
- Choosing a Filming Location
- Why Sound and Lighting Matter
- Optimizing Sound for Your Set
- Optimizing Lighting for Your Set
- Set design tips for engaging videos
- Types of Backdrops

 Becki and Chris
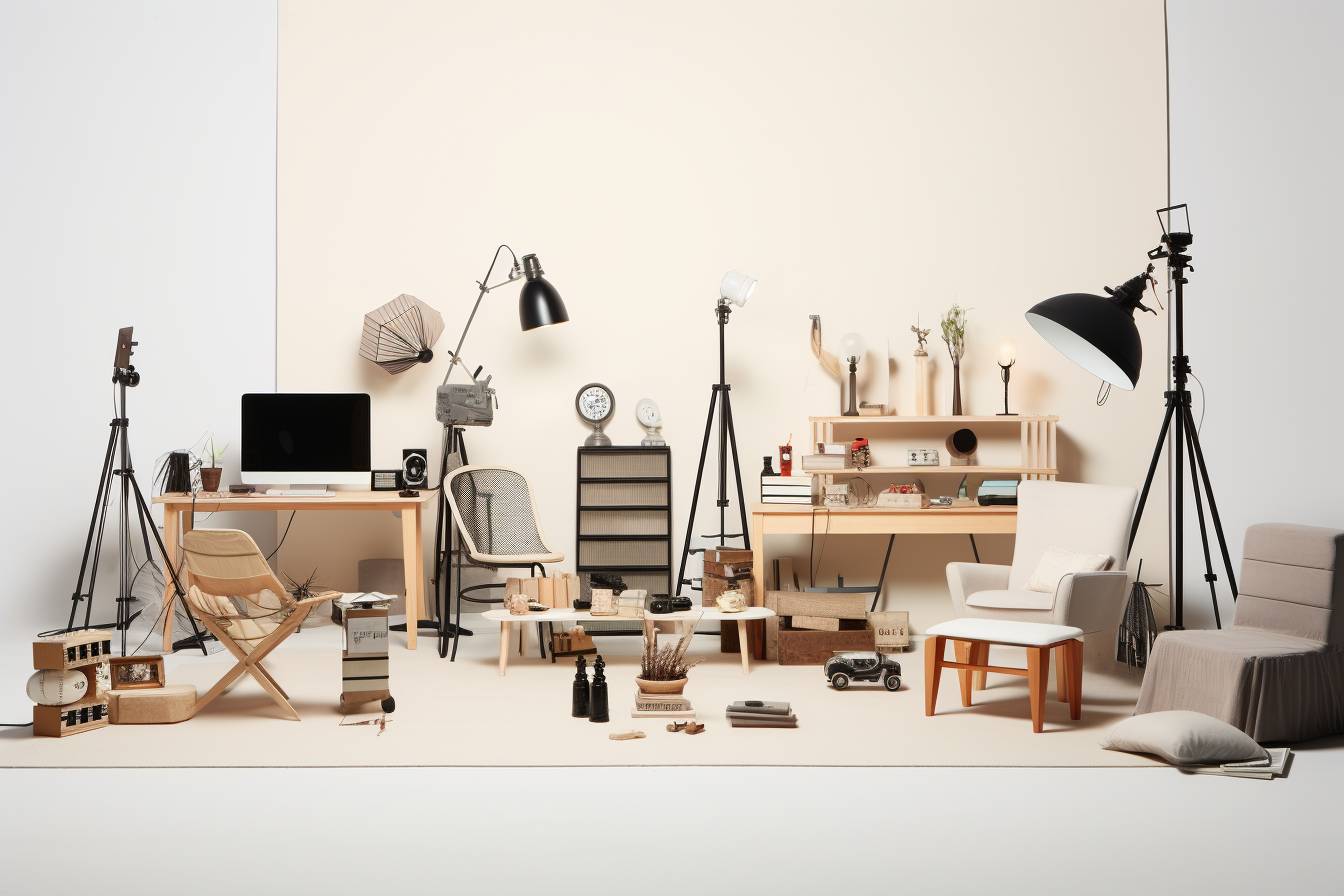
Set and Background
Choosing a Filming Location
An essential aspect of creating successful YouTube content is selecting the appropriate filming location. Your choice of location can make a significant impact on viewer experience, retention rate, and overall engagement with your videos. Carefully consider various factors, including lighting, sound, appearance, and resources availability, to make an informed decision.
Importance of Choosing the Right Filming Location
-
Visual Appeal: A well-chosen location can elevate the production value of your videos and create a more professional and visually appealing content.
-
Sound Quality: Selecting a silent and controlled location ensures high-quality audio free of unwanted noise and distractions.
-
Audience Connection: A relevant and relatable filming location can establish a stronger connection with the target audience, enhancing the video's impact and resonance.
-
Filming Efficiency: A convenient and accessible filming location can maximize productivity, minimize disruptions, and allow for more efficient content creation.
Do's
- Consider your video's purpose, target audience, and narrative when selecting a location to align with your messaging and content strategy.
- Prioritize adequate lighting, whether utilizing natural light or artificial light sources, as it can significantly affect your video's quality.
- Assess the potential sound quality and acoustics, opting for quieter environments with minimal background noise interference.
- Ensure you have all necessary permits, permissions, and access when filming in public or private locations.
- Scout multiple locations before settling on the best option, taking into consideration availability, feasibility, and cost.
Don'ts
-
Do not choose visually cluttered or distracting backgrounds that can detract from your message or content's focal point.
-
Avoid locations with uncontrollable noise and ambiance, such as crowded public spaces or areas near busy highways.
-
Do not film in areas with limited access to resources, such as electricity, Wi-Fi, restrooms, or equipment storage, hindering your ability to shoot efficiently.
-
Do not infringe on private property or restricted areas without permission and documentation, as this may lead to legal complications and potential interruptions during filming.
-
In-home studio or office space
-
Public parks and nature reserves
-
Co-working spaces and rented studio facilities
-
Abandoned buildings or unique architectural settings
-
Event spaces and conference rooms
By selecting the ideal filming location for your YouTube video, you can create higher-quality content, captivate your audience, and ultimately grow your YouTube channel.
For additional resources on creating content for YouTube, check out how to make YouTube videos.
Optimizing Your Set for Sound and Lighting
Great content on YouTube goes beyond a well-written script and visual storytelling. It includes optimizing your set for sound and lighting, which can make a significant difference in the quality of your videos. In this section, we'll explore the importance of sound and lighting in your YouTube set, as well as tips to enhance both aspects.
Why Sound and Lighting Matter
It's been reported that a considerable 50% of viewers abandon a video if the audio quality is poor. Moreover, having good lighting is crucial for engaging viewers, as it makes the visuals of your video clear, and actions or emotions easy to understand. Proper lighting can also evoke a mood or atmosphere that enhances the storytelling aspect of your video.
Optimizing Sound for Your Set
Do's
-
Invest in a good-quality microphone: Using an external microphone instead of the built-in one in your camera can greatly improve your audio quality. Popular options for YouTube creators include lavalier mics, shotgun mics, and USB microphones.
-
Soundproof your set: To minimize background noise and echo, use soundproofing materials, like foam panels or moving blankets, on walls or ceilings.
-
Use noise reduction software: After recording, clean up audio using software like Adobe Audition, Audacity, or Final Cut Pro X.
Don'ts
-
Don't ignore audio levels: Ensure your audio levels aren't too high or too low, as it may result in distortion or unwanted noise.
-
Don't record in noisy environments: If possible, choose a quiet location for recording, as it results in better audio quality.
Optimizing Lighting for Your Set
Do's
-
Invest in proper lighting equipment: Softbox lights, ring lights, and LED panels are popular options for YouTube creators, as they provide diffused and even lighting on the subject.
-
Utilize natural light: If your set is near windows, take advantage of the daylight for a soft, flattering light source.
-
Experiment with three-point lighting: This technique involves a key light, a fill light, and a backlight to create a balanced and visually appealing setup.
-
Set the mood with color: Use colored gels or RGB lights to add a touch of color and create various moods in your videos.
Don'ts
-
Don't rely solely on built-in camera flash: Built-in flashes can result in harsh shadows and over-exposure.
-
Don't use overhead lights: Overhead lighting often creates unflattering shadows on the subject’s face and fails to provide even illumination.
By optimizing your YouTube set for sound and lighting, you can greatly enhance the overall quality of your videos. With the right equipment, techniques, and attention to detail, you're one step closer to producing professional-grade content that will engage and entertain your viewers. For more tips on how to make YouTube videos, check out these online courses and educational resources.
Set and Background
Set design tips for engaging videos
1. Choose a consistent theme
Your set design should complement your content's theme and enhance your overall brand identity. Opting for a consistent theme will help your viewers to recognize your style and create a sense of continuity .
2. Consider color psychology
3. Lighting is critical
Proper lighting can enhance your set's overall look and improve the quality of your videos. Adequate lighting can highlight important aspects of your set and help create depth. Invest in quality lighting equipment to ensure your set looks professional.
4. Add personal touches
Incorporate elements like artwork, posters, or memorabilia that show your personality and interests. Personal touches can help your audience connect with you on a deeper level.
5. Keep a clean and organized space
A cluttered set can be distracting and unprofessional. Ensure the area within view of the camera is neat and orderly. If you are working from a home office or studio, try organizing your workspace and storing items outside the frame.
6. Soundproof your set
Poor audio quality can negatively impact viewer retention. Invest in soundproofing materials to minimize echoes and distracting noises. To learn more about soundproofing and optimizing your video's audio quality, explore our guide on how to make YouTube videos.
7. Opt for adjustable set elements
Consider using adjustable elements like backdrops and stands to change the look and feel of your set without needing to invest in expensive equipment.
8. Invest in quality equipment
The right equipment can greatly impact your set design and overall video production quality. Invest in sturdy tripods, quality microphones, and suitable cameras to ensure high-quality content. Browse through our guide on best camera for YouTube for more information.
9. Plan your set with your camera angles in mind
Choose a background that doesn't cause distractions or blend in with clothing or props. Think about your camera angles and ensure nothing is obstructing the view of the main focal points on your set.
10. Take inspiration, but be original
Observe popular YouTube channels for inspiration on set design, but don't copy their ideas outright. Incorporate your unique touch to the set to make it authentically yours.
By implementing these set design tips, you can create an engaging and visually appealing background for your videos that ultimately enhances your content and connects with your audience. For additional resources and tools, browse through our article on the best tools for YouTube creators.
Set and Background
Using backdrops and green screens
Using backdrops and green screens is a popular technique to improve visual quality and add elements of interest to videos. This technique allows creators to easily change their backgrounds, whether it’s to create a consistent look, enhance their storytelling, or simply add a professional touch to their YouTube content. In this guide, we will explore the key considerations for using backdrops and green screens, as well as tips for achieving optimal results.
- Professionalism: A clean and customized background helps deliver a polished and professional appearance to viewers, which can increase credibility and viewer retention.
- Flexibility: Green screens enable creators to use various backgrounds, which helps keep content fresh and engaging.
- Visual storytelling: Green screens can be used to add context, convey emotions, or set the mood while telling stories through visuals.
- Branding: They provide an opportunity to showcase your unique brand, personality, and style.
Types of Backdrops
Solid-color Backdrops
Solid-color backdrops are the simplest and most affordable option for enhancing your set. They provide a clean and professional look to your videos. You can choose different colors, but neutral shades like white, gray, and black are most commonly used.
Printed Backdrops
These backdrops have unique designs, patterns, textures, and images printed on them to create a visually appealing background. They are an excellent choice for setting the tone of your content and can help you stand out on YouTube.
Green Screens
Green screens are made of specifically colored fabric or painted walls that help replace the green background with any digital image during post-production. This allows the creator to transport themselves or their subjects to a virtual environment, thereby adding a dynamic element to their videos.
Do's:
- Light the backdrop and subject evenly to ensure smooth and successful post-production edits.
- Ensure that the subject is at least 5-6 feet away from the green screen to avoid green spill and shadows.
- Choose a smooth fabric or painted wall that is wrinkle-free and evenly colored for a consistent green background.
- Use tripod stands or mounting systems to keep the screen or fabric stretched and flat.
Don'ts:
- Don't wear green clothing or accessories if using a green screen as they will blend into the background and make editing difficult.
- Don't mix natural and artificial lighting sources without adjusting their color temperatures, as it can create uneven colors on the screen.
- Don't rush through the keying process during post-production. Fine-tune your edits to get a seamless, professional result.
- Don't forget to check for updates in keywords for YouTube to ensure your content stays relevant and visually appealing.
Backdrops and green screens can significantly enhance your YouTube videos while providing a professional touch. Invest time and effort in perfecting your setup, so your videos stand out from the competition. To gain further insights into content creation, be sure to explore how to make YouTube videos and other relevant resources to help you on your YouTube journey.
Video Stabilization and Movement Equipment
- Gimbals and Stabilizers
- Sliders and Dolly Systems
- Table Tripod and Mount Types
- Traditional Tripods
- GorillaPod
- Gimbal Stabilizers
- Fluid Head Tripods
- Monopods

 Oliver Astrologo
Video Stabilization and Movement Equipment
Gimbals and Stabilizers
Creating high-quality YouTube videos requires the use of advanced tools and equipment. One of the most essential pieces of equipment is a gimbal or a stabilizer. Gimbals and stabilizers help create smooth and professional-looking videos by minimizing camera shakes and maintaining stability.
Types of Gimbals and Stabilizers
-
3-Axis Gimbals: These gimbals have three motors that independently control the pitch, roll, and yaw axes, providing better control and stability. They are usually the most popular choice for content creators.
-
2-Axis Gimbals: These gimbals control the pitch and roll axes, offering good stability but slightly less flexibility when compared to 3-axis gimbals.
-
Manual Stabilizers: These stabilizers rely on counterweights and user-controlled movements to balance and stabilize the camera. They require more practice to master but can be an affordable option for beginners.
- Improved video quality by reducing camera shake and unwanted movements
- Enhanced stability during filming, especially if working with action shots or during movement
- Better control over the camera movement and framing
- Professional-looking videos, setting you apart from your competitors
How to choose the right Gimbal or Stabilizer for your needs
-
Compatibility: Ensure that the gimbal or stabilizer supports the weight and size of your camera and lens combination.
-
Battery Life: Consider the battery life and charging options of the gimbal or stabilizer to avoid interruptions during your shoots.
-
Ease of use: Look for a gimbal or stabilizer with user-friendly controls and functions that are easy to operate.
-
Price: Compare the prices of different gimbals and stabilizers to find one that fits your budget and offers the features you need.
-
Reviews: Read reviews from other users and professionals to make an informed decision before purchasing.
-
Do practice using your gimbal or stabilizer before filming important video shoots
-
Do balance your gimbal or stabilizer properly to achieve the best results
-
Do use additional equipment such as tripods or monopods when needed for extra stability
-
Don't rely solely on your gimbal or stabilizer – it's important to have solid camera operating skills in addition to using these tools
-
Don't ignore the importance of good video editing software. Learn how to edit YouTube videos for better results.
-
DJI Ronin S2: A popular 3-axis gimbal with advanced features and a lightweight design, suitable for most DSLR and mirrorless camera setups.
-
Zhiyun Crane 2S: A versatile 3-axis gimbal designed for various camera systems, offering professional-level stabilization and flexibility.
-
Glidecam HD-PRO: A well-regarded manual stabilizer that provides smooth footage and reliable performance for a wide variety of shooting scenarios.
Investing in a high-quality gimbal or stabilizer is essential for creating high-quality YouTube videos. By understanding the different types of gimbals and stabilizers available, their benefits, and how to choose the right one for your needs, you can improve your video production quality and impress your audience. For more tips on creating successful YouTube videos, consider reading about how to make youtube videos.
Video Stabilization and Movement Equipment
Recommended Stabilization Equipment for Various Budgets
In this section, we will evaluate and recommend different stabilization equipment for various budgets. No matter how big or small your budget is, having stable footage can make all the difference in your video quality.
Entry-Level Budget Smartphone Stabilizers and Mini Tripods
You don't need to spend a fortune to start stabilizing your videos. For those using a smartphone to record their content, consider affordable, mobile-specific gimbals like the DJI Osmo Mobile 3 ($99) or the Zhiyun Smooth 4 ($99).
Alternatively, mini tripods like the Joby GorillaPod Mobile ($30) or the Manfrotto PIXI ($25) can provide stable platforms for shooting.
Mid-range Budget DSLR/Mirrorless Camera Gimbals and Tripods
For creators using DSLR or mirrorless cameras, a mid-range budget can allow for more durable stabilization options. The Zhiyun Crane 2 ($299) or the DJI Ronin-S ($369) are top-notch gimbals in this price range, both providing impressive stabilization to your videos.
For a more stationary setup, consider investing in a quality tripod, like the Manfrotto Befree ($200) or the Benro Slim ($100).
High-end Budget Professional Gimbals and Tripods
If you have a significant budget, the sky's the limit for stabilization options. Gimbal options like the Moza Air 2S ($499) or the DJI RS 2 ($849) provide the best stabilization features and payload capacity for larger camera setups.
For professional-level tripods, options like the Manfrotto 055 ($330) or the Sachtler Flowtech 75 ($1,500) provide a stable and reliable support for your camera.
Remember, investing in suitable stabilization equipment will greatly improve your video quality and make your content visually appealing. Apart from stabilization, proper editing techniques and an understanding of how to make YouTube videos can have a significant impact on your content's success.
Video Stabilization and Movement Equipment
Sliders and Dolly Systems
Sliders and dolly systems are essential tools in creating professional-looking video content on YouTube. In combination with camera gimbals, steadicams, and tripods, sliders and dolly systems enhance the quality of YouTube videos and create smooth, stable, and dynamic shots. This section will delve into the benefits, features, comparisons, and usage of various sliders and dolly systems for YouTube creators.
- Smooth movement: Sliders and dolly systems provide smooth and stable camera movements in video production, enhancing the overall quality of YouTube content.
- Professional look: Incorporating sliding shots into YouTube videos can give them a more polished, professional appearance.
- Versatility: These tools can be used in various shooting scenarios and setups, adding dynamic movement to static shots.
- Accessibility: With the variety of affordable options available, sliders and dolly systems are accessible to creators of all skill levels and budgets.
Types of Sliders and Dolly Systems
- Manual sliders: The simplest and most common type, manual sliders require the user to physically move the camera along the rails.
- Motorized sliders: These sliders offer motorized control, using a remote control or smartphone app to adjust the speed and direction of movement.
- Tabletop dolly systems: Suitable for smaller cameras and devices, these portable dolly systems can be used on tabletops and other smooth surfaces.
- Professional dolly systems: Larger, track-based systems typically used in professional video production.
Key Features to Consider
- Size and weight capacity: Consider the size of your camera and the weight it can handle.
- Length of rails: Longer rails allow for extended camera movements and more dramatic shots.
- Portability: Compact sliders and dolly systems are easy to transport and set up at different locations.
- Motorization: Motorized systems provide smoother motion and greater control over the shot.
- Mounting options: Ensure the slider or dolly system is compatible with your existing camera and tripod setup.
Do:
- Invest in a slider or dolly system that fits your camera and your production needs.
- Regularly clean and maintain your equipment to ensure optimal performance.
- Practice using your slider or dolly system to get familiar with its features and capabilities.
Don't:
- Overload your slider or dolly system with a camera that is too heavy.
- Rely solely on a slider or dolly system for stabilization; consider combining it with other stabilization tools like gimbals and tripods.
- Use sliders or dolly systems on uneven surfaces, as this can cause instability and unwanted camera movements.
| Brand | Model | Type | Price Range |
|---|---|---|---|
| Neewer | Camera Slider Carbon Fiber Dolly Rail | Manual Slider | $60-$100 |
| Edelkrone | SliderONE PRO v2 | Motorized Slider | $400-$500 |
| Glide Gear | SYL-101 Skate Wheel Tabletop Mobile Dolly | Tabletop Dolly | $25-$50 |
| Proaim | 12ft Jib Arm Camera Crane Extension Package | Professional Dolly | $700-$1000 |
Investing in a slider or dolly system can greatly improve the quality of your YouTube content, adding smooth movement and dynamic shots. By understanding the different types, features, and usage tips, you can choose the best slider or dolly system for your specific needs. For more insights on YouTube video production, check out our guide on how to make YouTube videos.
Types of Tripods and Mounts
Table Tripod and Mount Types
| Type | Purpose | Pros | Cons |
|---|---|---|---|
| Traditional Tripod | General Stabilization | Versatile, adjustable, solid support | Bulky, may need to be replaced |
| GorillaPod | Flexible Mounting | Bendable legs, attach to objects, portable | Limited weight capacity |
| Gimbal Stabilizer | Smooth Movement | Motorized control, 3-axis stabilization, lightweight | Expensive, requires power source |
| Fluid Head Tripod | Pan & Tilt Shots | Smooth movements, high load capacity | Expensive, heavy |
| Monopod | Lightweight Support | Minimal setup, portable, quick adjustments | Limited stability, needs user balance |
Traditional Tripods
Traditional tripods are the most common type of stabilization equipment used in video production. They provide a stable base for cameras and can support a variety of weight classes. The adjustable legs and head allow for quick and easy positioning to achieve the desired shot. However, traditional tripods can sometimes be bulky and will eventually need to be replaced as they wear out.
GorillaPod
GorillaPods are a unique and innovative type of tripod that features bendable legs that can wrap around objects for secure and versatile mounting. Their lightweight and portable design allows for unconventional camera angles and positions, making them perfect for on-the-go filming or vlogging. The main drawback of GorillaPods is their limited weight capacity, so they are best suited for smaller cameras.
Gimbal Stabilizers
Gimbal stabilizers are motorized stabilizers that provide 3-axis stabilization for smooth and fluid camera movements. They are particularly useful for action shots, walking, or tracking shots where traditional tripods are not feasible. The main downside of gimbals is the expense and the requirement of a power source to operate.
Fluid Head Tripods
This type of tripod is specifically designed for smooth pan and tilt movements in videography. Fluid head tripods provide a high load capacity and are ideal for larger cameras. While their smooth motion is a major advantage, fluid head tripods are typically more expensive and heavier than traditional tripods.
Monopods
Monopods are lightweight, single-leg support systems for cameras. While they don't provide the same level of stability as tripods, their minimal setup and quick height adjustments make them ideal for situations where a full tripod may be cumbersome. Monopods require the user to maintain balance, as they lack the solid base of a tripod.
- Do choose a tripod or mount that supports your camera's weight and is compatible with your shooting style.
- Do invest in quality equipment to ensure smooth camera movements and optimal stabilization.
- Don't sacrifice stability for portability – choose a balance that works best for your needs.
By understanding the types of tripods and mounts available and their respective strengths and weaknesses, you can make an informed decision when selecting the best stabilization equipment for your YouTube videos. For more information on how to make YouTube videos, click here.
YouTube Live Streaming Equipment
- Microphones
- Audio interfaces and mixers
- Headphones
- Lighting for live streaming
- Recommended live streaming setups for various budgets
- Table Popular Webcams and Live Streaming Cameras

 Senpai Gaming
YouTube Live Streaming Equipment
Audio equipment for live streaming
Investing in high-quality audio equipment is crucial for delivering an enjoyable experience to your viewers during live streams. In this section, we will discuss the different audio equipment options for live streaming, their features, and how to choose the best one for your needs.
Microphones
Having a high-quality microphone is essential to capture clear and crisp audio, reducing background noise and enhancing your voice. There are various types of microphones available, each with its pros and cons:
- Dynamic microphones: These mics are durable and well-suited for handling loud sounds, making them ideal for musical performances or interviews in noisy environments.
- Condenser microphones: These microphones offer a higher level of audio quality and sensitivity but can easily pick up background noise. They are excellent for studio settings, quiet spaces, or podcasts.
- Lavalier microphones: These small clip-on mics are a popular choice for interviews, live presentations, and vlogs, as they free up your hands and maintain a consistent distance from your mouth.
Audio interfaces and mixers
An audio interface connects your microphone to your computer, converting the analog signal from your mic into a digital one that your streaming software can process. Some popular audio interfaces include the Focusrite Scarlett series and the Presonus AudioBox series.
Mixers allow you to control multiple audio sources, adjust their volume levels, and add effects like reverb or EQ. This can help you achieve a more professional sound during your live streams.
Table: Popular audio interfaces and mixers for live streaming
| Interface/Mixer | Price Range | Pros | Cons |
|---|---|---|---|
| Focusrite Scarlett Solo | $100 - $150 | Easy setup, good audio quality | Limited inputs, no built-in effects |
| Behringer Xenyx Q802USB | $100 - $150 | Versatile with built-in effects, multiple inputs | May require time to learn and set up |
Headphones
To avoid audio feedback, it's essential to wear headphones during live streaming. Using headphones will also help monitor your audio and adjust levels accordingly. There are two main types of headphones to consider: closed-back and open-back. Closed-back headphones provide better sound isolation, while open-back headphones offer a more natural listening experience.
For more tips on how to make YouTube videos, check out our list of online courses and educational resources.
Do invest in a high-quality microphone designed for live streaming purposes, as it will significantly improve your audio quality.
Do consider using a pop filter with your microphone, as it helps reduce plosive sounds (like "p" and "b") and improve overall audio clarity.
Don't rely solely on your camera's built-in microphone, as they often produce poor audio quality and pick up a lot of background noise.
Don't forget to monitor your audio levels and adjust accordingly to maintain a consistent and professional sound.
By carefully selecting the right audio equipment for your live streaming needs, you can ensure crystal-clear audio quality to enhance your content and engage your viewers.
YouTube Live Streaming Equipment
Lighting for live streaming
Why lighting is important for live streaming
Effective lighting serves multiple purposes:
- Enhances video quality - Good lighting can significantly improve the clarity and sharpness of your footage.
- Creates depth - Properly lit videos appear more three-dimensional, with clearly defined subjects and backgrounds.
- Sets the mood - Lighting can help convey specific emotions or create particular atmospheres.
- Increases viewer engagement - High-quality visuals help keep your audience's attention and make your content more enjoyable.
Types of lighting setups for live streaming
There are numerous lighting setups available for live streaming, ranging from simple and affordable solutions to high-end, professional-grade equipment. Here are four common setups:
- Natural light - Using sunlight or ambient lighting from windows is an inexpensive option that can produce good results under the right conditions. However, this method lacks control over intensity and color temperature and is not ideal for nighttime streams.
- Ring lights - These circular LED lights are popular among YouTubers and vloggers for their flattering, even illumination. They are inexpensive and easy to use, though they may lack the versatility of other methods.
- Softboxes - Designed to diffuse light sources, softboxes create a soft, even glow that can be adjusted to fit your scene or subject. They are an excellent choice for more polished, professional-looking streams.
- Three-point lighting - This setup involves using three separate light sources (key light, fill light, and back light) to create a balanced, well-lit composition. While more complex and potentially expensive, three-point lighting provides ultimate control and flexibility.
- Do invest in a good lighting kit if you plan to stream regularly, as high-quality equipment can greatly enhance your footage.
- Do experiment with different setups to find which works best for your specific needs and space.
- Do adjust the exposure settings on your camera to compensate for lighting, ensuring that your footage is neither too bright nor too dark.
- Do use color gels or filters to add dimension and interest to your lighting setup.
- Don't rely solely on your camera's auto-exposure settings, as they may not produce the best results under certain lighting conditions.
- Don't place your lights too close to your subject, as this can cause harsh shadows and glare.
- Natural light: Place your subject near a window to take advantage of sunlight or ambient lighting. Make sure there are no direct sources of glare.
- Ring light: Position the ring light directly in front of your subject, ensuring the camera is centered in the middle of the light for an even glow.
- Softboxes: Place one softbox on either side of your subject to create soft, diffused lighting without shadows.
- Three-point lighting: Arrange your key light, fill light, and back light at different angles to illuminate your subject from multiple directions, creating depth and definition.
To learn more about creating quality YouTube content, check out our resources on how to make YouTube videos.
YouTube Live Streaming Equipment
Recommended live streaming setups for various budgets
When it comes to live streaming on YouTube, having the right equipment can dramatically improve the quality of your content and overall viewer experience. In this section, we'll look at recommended live streaming setups for various budgets, from entry-level to professional. We'll discuss cameras, microphones, lighting, and other essential gear to elevate your live streams and engage your audience.
Entry-Level Setup: $300 to $500
As a content creator just starting with live streaming or on a tight budget, you can create decent live streams with minimal investment. An entry-level setup typically includes a decent-quality webcam, a USB microphone, and basic lighting.
Camera: Logitech C920 HD Pro Webcam – This affordable camera captures high-definition video up to 1080p and provides excellent image quality. [Price: around $70]
Microphone: Blue Snowball ICE or Samson Meteor Mic – Both are quality USB microphones, offering solid audio quality and noise reduction at an affordable price. [Price: around $50 to $70]
Lighting: Neewer Ring Light or a desk lamp with a softbox – Proper lighting is important for a polished look. A ring light or desk lamp with a softbox can provide a soft, diffused light that minimizes shadows. [Price: around $25 to $100]
Intermediate Setup: $500 to $2,000
Content creators who want to level up their live streaming can invest in higher-quality cameras and microphones to achieve better video and sound quality, as well as more advanced lighting solutions.
Camera: Canon M50 – This camera offers a broader range of features than a webcam, including interchangeable lenses, 4K video recording, and a flip-out screen. [Price: around $500 to $800, including a lens]
Microphone: Rode VideoMic Pro or Audio-Technica AT2020 – These are significant upgrades from a USB microphone, providing better audio quality and options for adjusting gain or filtering background noise. [Price: around $100 to $230]
Lighting: Elgato Key Light – This high-quality LED light panel offers adjustable color temperature and brightness, making it easy to customize your lighting setup. [Price: around $200]
Audio Interface: Focusrite Scarlett 2i2 – An audio interface allows you to connect professional microphones to your computer. The Scarlett 2i2 is a popular choice among content creators for its affordability, reliability, and quality. [Price: around $160]
Professional Setup: $2,000 and up
For professional live streaming, investing in high-quality gear can make a significant difference in the overall production value of your content.
Camera: Sony a6400, Canon EOS R, or Panasonic Lumix GH5 – These cameras offer advanced features like 4K video recording, excellent low-light performance, and faster autofocus. [Price: around $900 to $2,000, including a lens]
Microphone: Rode NTG3 or Sennheiser MKH 416 – These shotgun microphones are popular among professional content creators for their excellent sound quality and low noise levels. [Price: around $600 to $1,000]
Lighting: Aputure AL-MX or Godox SL60W with light modifiers – These professional-grade lights provide high-quality lighting with an adjustable color temperature, brightness, and beam angle. Light modifiers like softboxes or diffusers can help create a more polished look. [Price: around $300 to $600]
Audio Interface: Universal Audio Apollo Twin MKII or Focusrite Scarlett 18i20 – These audio interfaces offer more input options and additional features like built-in preamps for better sound quality. [Price: around $800 to $1,200]
It's important to remember that, while having the right equipment can enhance your live streams, the quality of your content and how you engage with your audience are ultimately what matter most. Regardless of your budget, focus on creating an engaging and informative live streaming experience for your viewers.
Lastly, consider learning some video editing techniques to make the most out of your recorded live streams and repurpose them for future content.
YouTube Live Streaming Equipment
Webcams and live streaming cameras
Choosing the right webcam or live streaming camera is crucial to ensure high-quality YouTube live streams. This section will dive into the various options available, their key features, and tips for selecting the best camera equipment for your needs.
Table Popular Webcams and Live Streaming Cameras
| Camera Model | Type | Price Range | Key Features |
|---|---|---|---|
| Logitech C920s | Webcam | $70-$100 | Full HD 1080p, dual built-in stereo microphones, light correction, autofocus, tripod-ready universal clip |
| Sony A6400 | DSLR | $900-$1,200 | 4K video, fast autofocus, real-time tracking, flip-up touch screen, built-in timelapse, microphone jack |
| Mevo Start | Camcorder | $400-$500 | 1080p, 4.5 hours of battery life, video-endcoding, built-in microphone, Wi-Fi, and Ethernet |
| GoPro HERO9 Black | Action Cam | $400-$500 | 5K video, HyperSmooth 3.0 stabilization, waterproof, front-facing screen, built-in webcams capability with GoPro Webcam App |
Do's
- Select a camera that fits your streaming needs, budget, and features you require.
- Ensure compatibility with your streaming software and platform.
- Look for cameras with good low-light performance if you plan on streaming in low-light conditions.
- Prioritize cameras with autofocus and image stabilization for smoother, cleaner videos.
Don'ts
- Don't assume that a higher price tag guarantees a better camera.
- Don't forget to consider the cost of additional equipment, such as a tripod, external microphones, or lighting.
- Don't limit yourself to just webcams; consider DSLRs, camcorders, and action cameras for additional functionality and versatility.
Understanding the various options for webcams and live streaming cameras is essential to ensure high-quality YouTube live streams. Along with camera selection, don't forget to invest in improving your skills in making YouTube videos for the best live streaming experience possible.
Looking for Brand Deals or Channel Strategy?
We run a platform for brand deals and an agency, helping creators derive maximum value from their content, while offering brands access to unparalleled, best-in-class research.
For Creators
- Strategic Brand Connections
- Outreach to Old Sponsors
- Platform to Manage Brand Deals
- View-Based Contract Negotiation
- Comprehensive Channel Strategy
- Channel/Thumbnail Optimization
For Brands
- Tools to Shortlist Creators
- Targeted Creator Outreach
- Detailed Sponsorship Reports on Existing Brands
- Platform to Manage Creator Deals
- View-Based Deal Facilitation
Apply to work with us or email [email protected]
 Ben Johnson
 Justin Brown - Primal Video
 Lila
Lila Becki and Chris
 Oliver Astrologo
 Senpai Gaming
Table of Contents
Work with us